AVI MP4
AVI
MP4
A COVID-19 contribution developed in self isolation:
HOW TO GET A COVID-19 FACE MASK WHEN NO PPE IS AVAILABLE FOR NORMAL PERSONS?
Coffee Filter Masks handcrafted from old Kitchen
Gloves
Here I show you how you can build your own CoffeeFilterMask from a rubber kitchen glove. This work has been done during a Saturday afternoon, the time I normally spend as a coach with children at the TUEFTELLABOR EINSTEIN in Zug. This work can therefore be considered as a part of my involvement with the TUEFTELLABOR EINSTEIN in Zug by respecting social distancing as conscribed by the federal government of Switzerland.
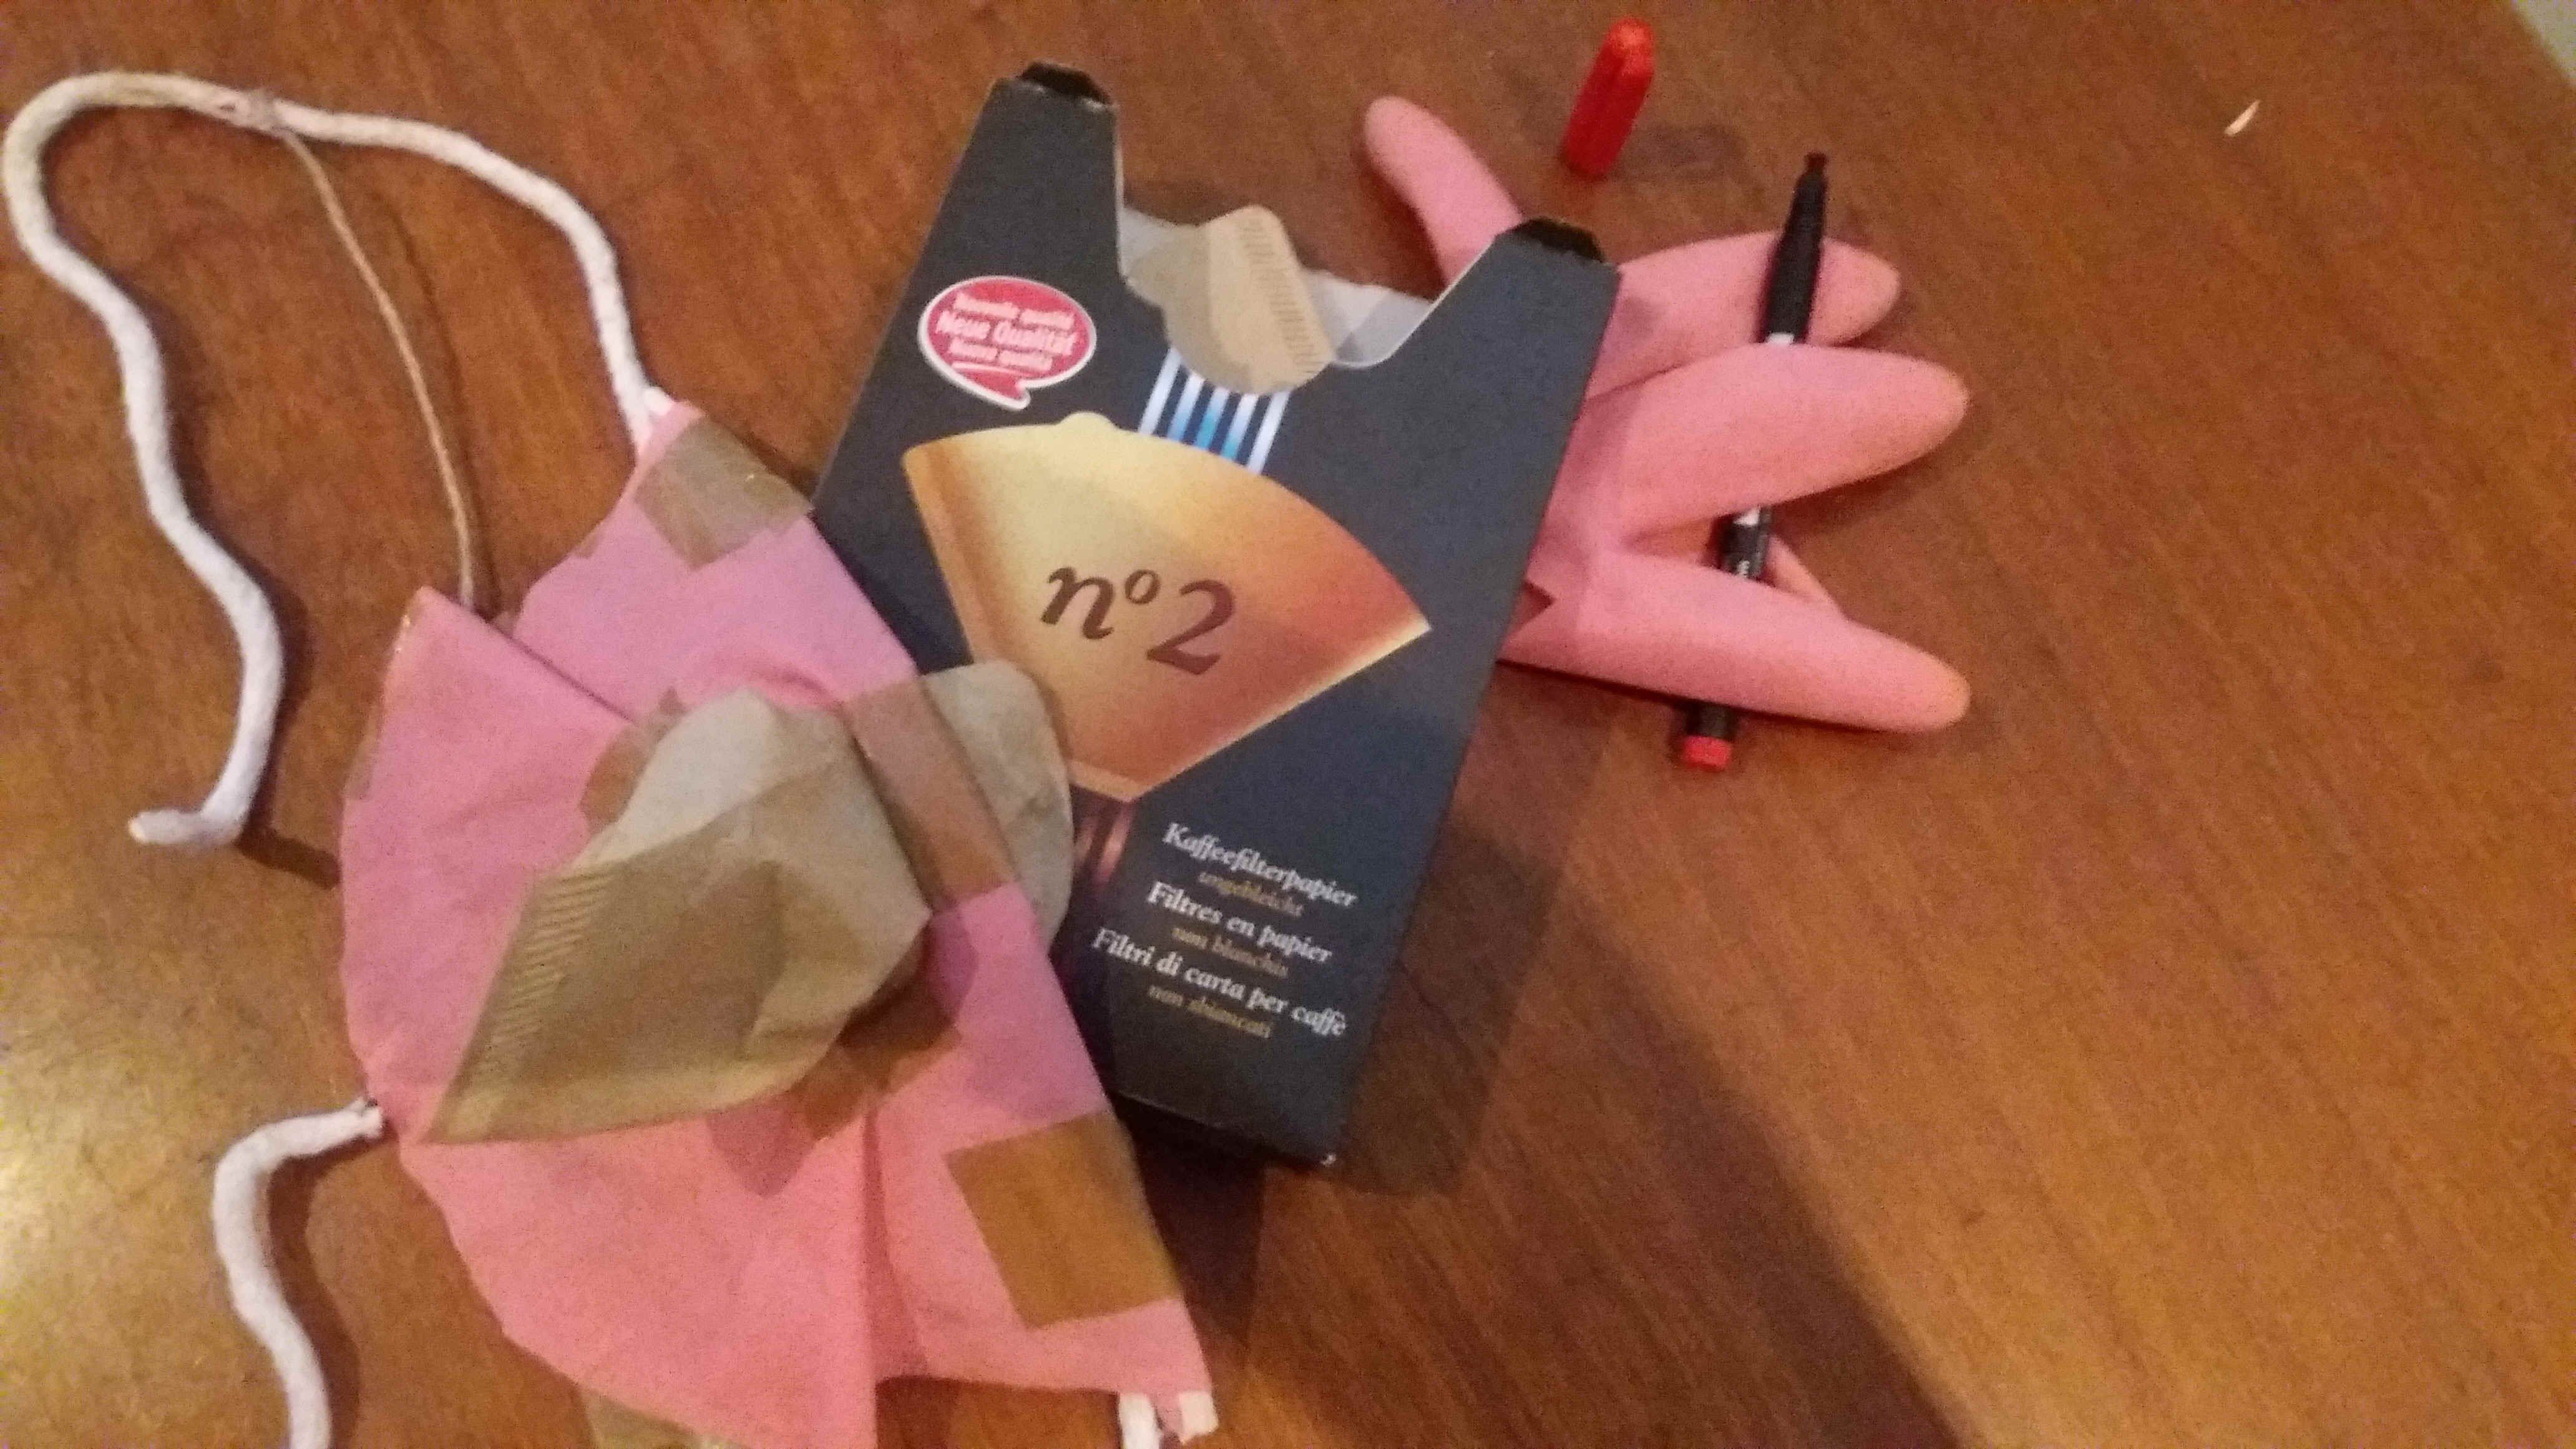
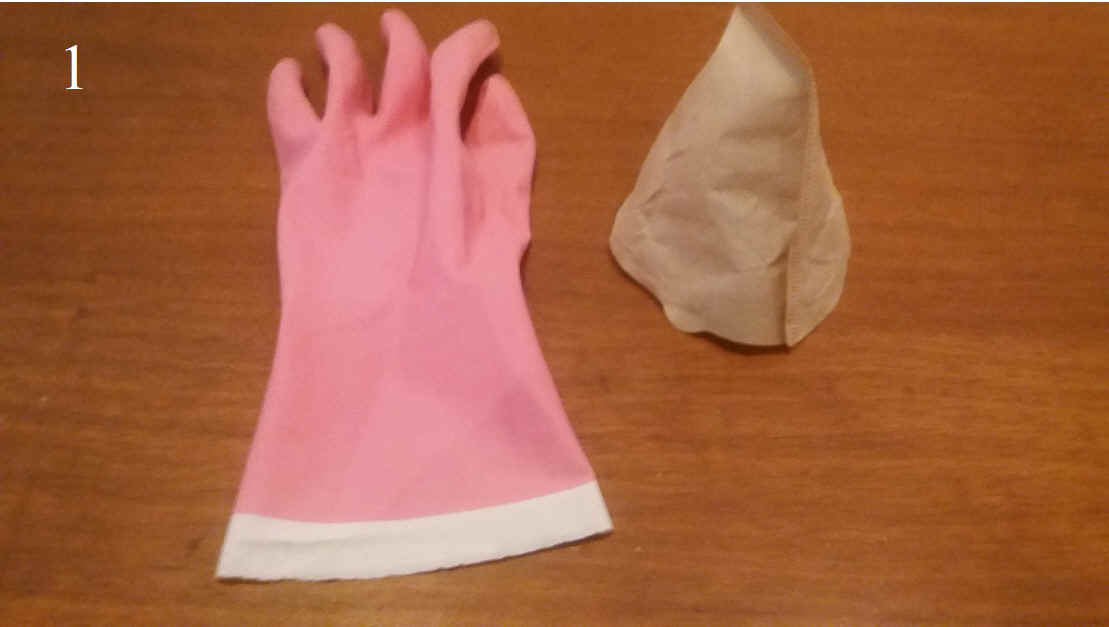
1 Shows the basic material used to get our respiratory protection mask for grocery shopping: a kitchen glove and coffee filters. Additional material should also be present in your household; of a scissor, tape, string and a marking pen.
2 Indicates of how to cut of the fingers of the glove.

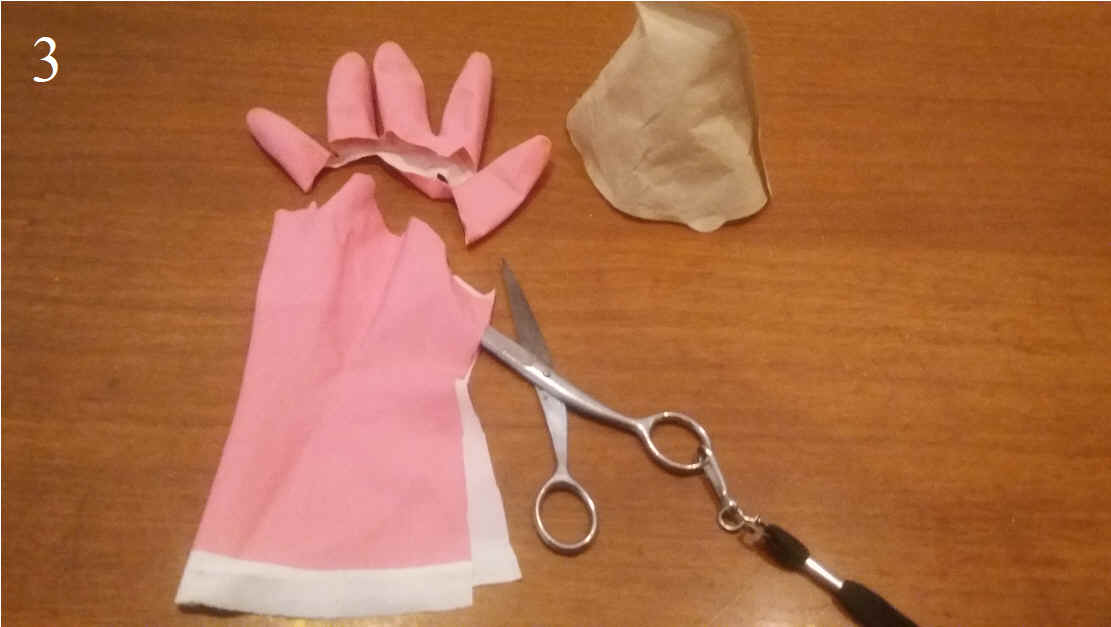
3 Cut open the glove on the shorter side, the side of the thumb.
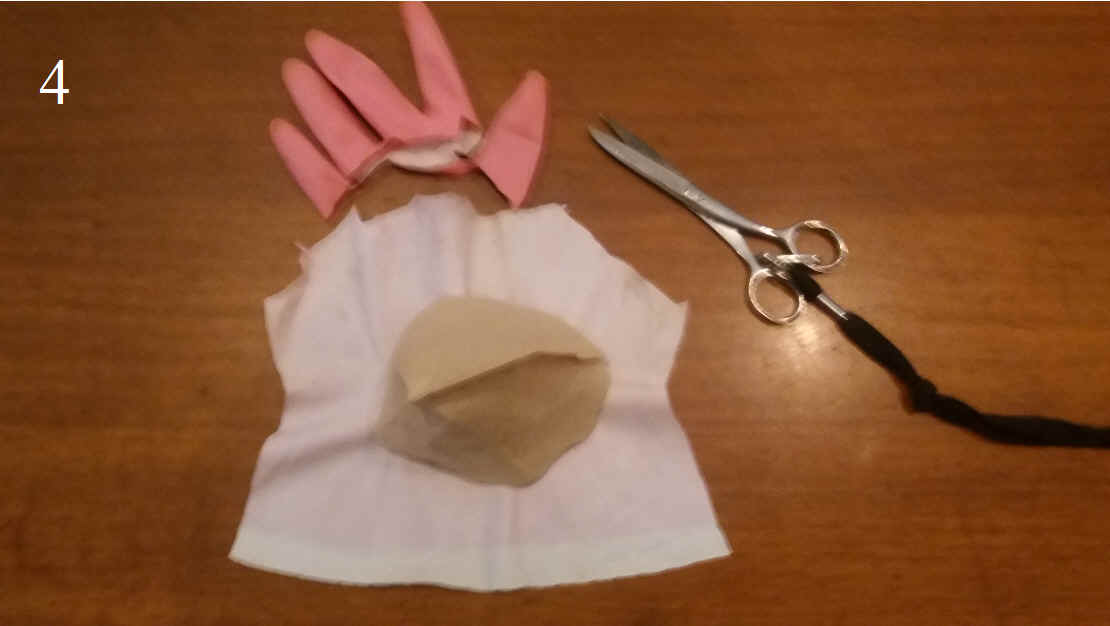
4 shows the coffee filter put in the middle of the opened glove, to indicate the position of the center of the filter.
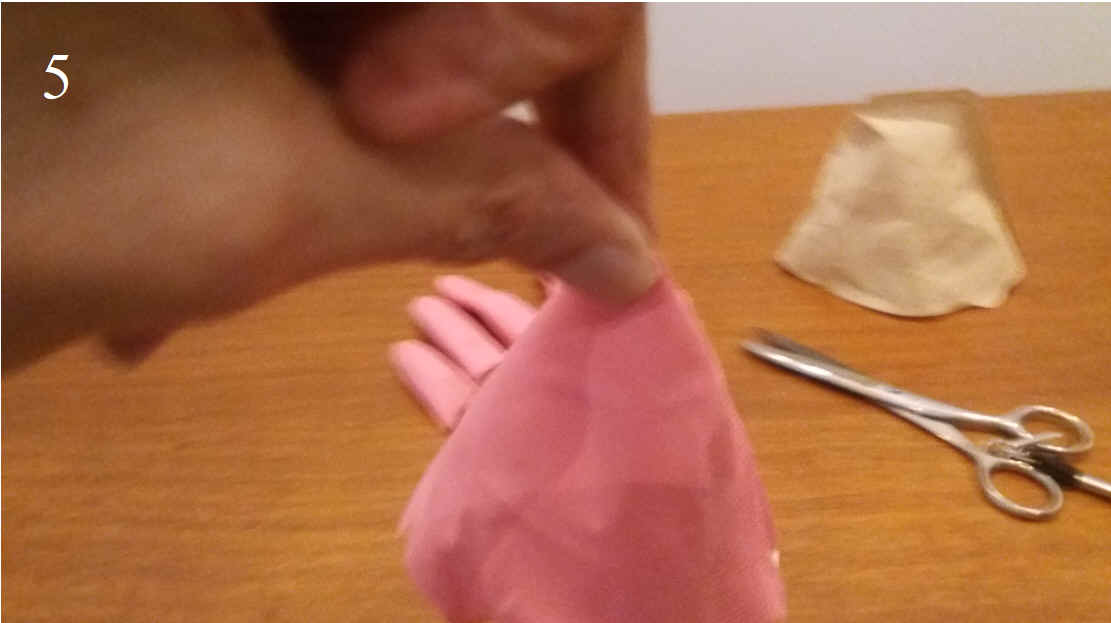
5 Grab the glove holding it on this center position and cot out at about 3cm from your fingers to get a round hole.
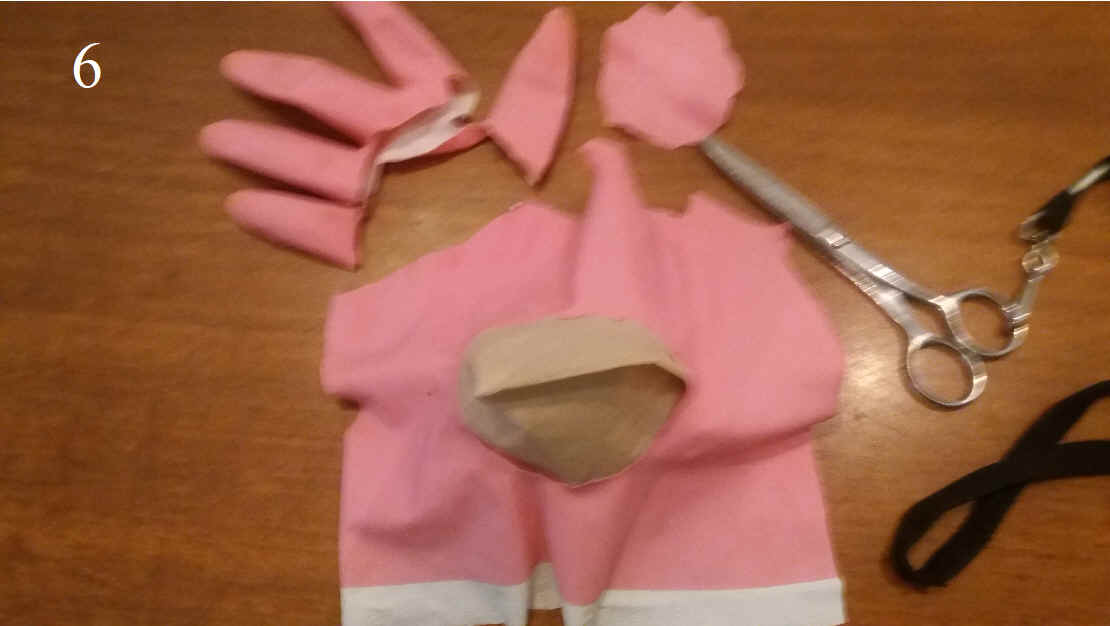
6 and 7 Show how the glove material is now placed over the coffee filter, which point across the hole.

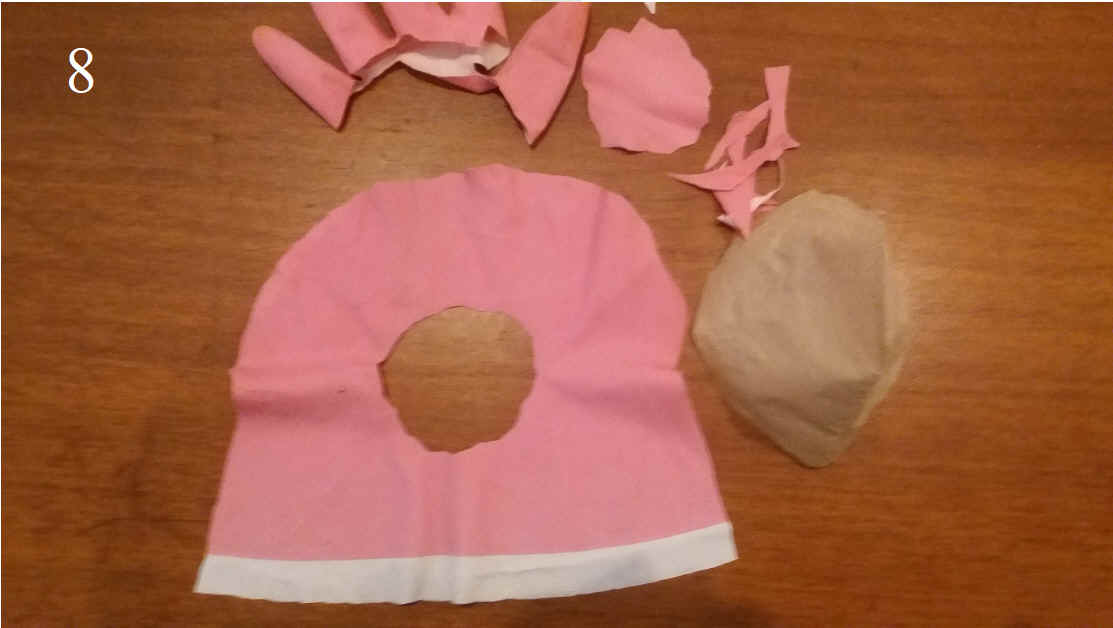
8 Carefully smoothen all cuts in order to prevent uneven places on all borders which could lead to tearing of the rubber when pulling stress is put on the mask
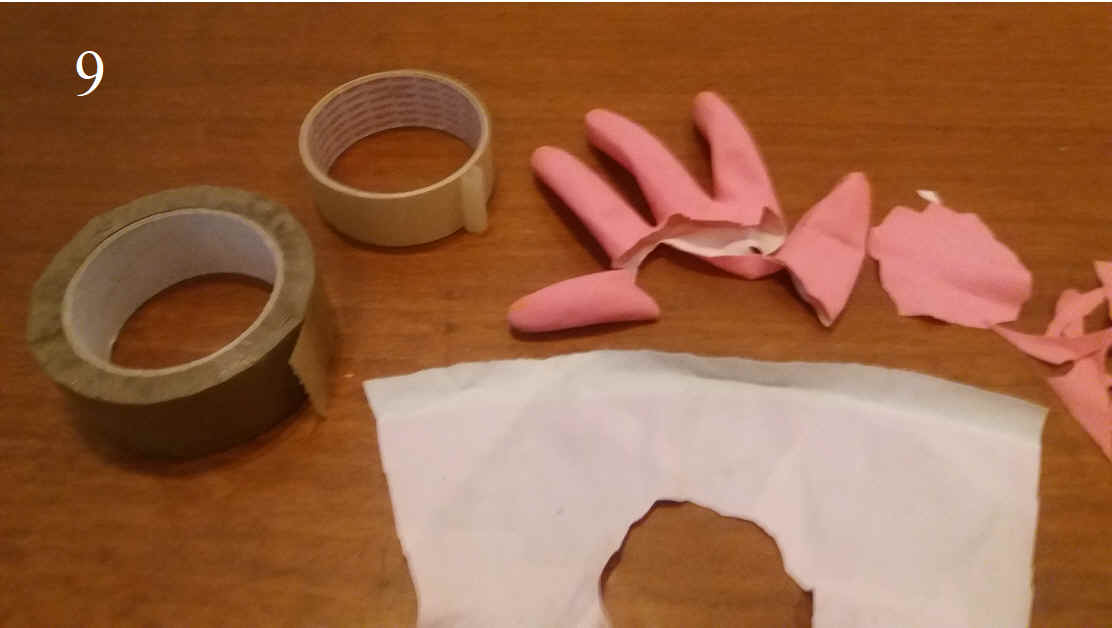
9 Flip the glove over with the arm side of the former glove away from you. The picture also shows two tapes: a plastic tape for mounting the mask and a masking tape for preparatory purposes.
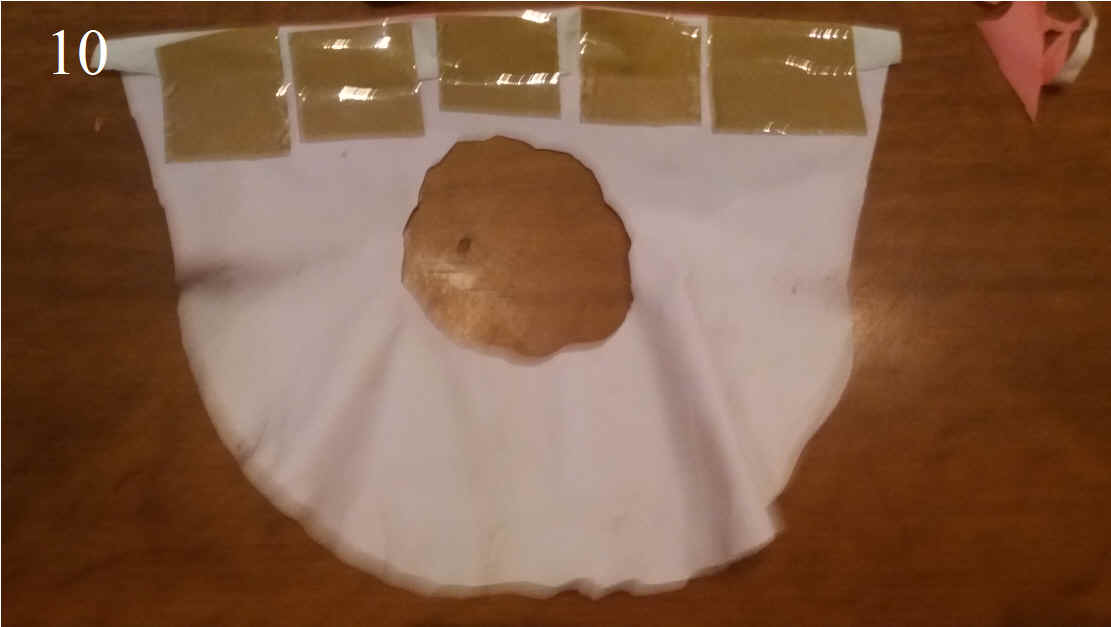
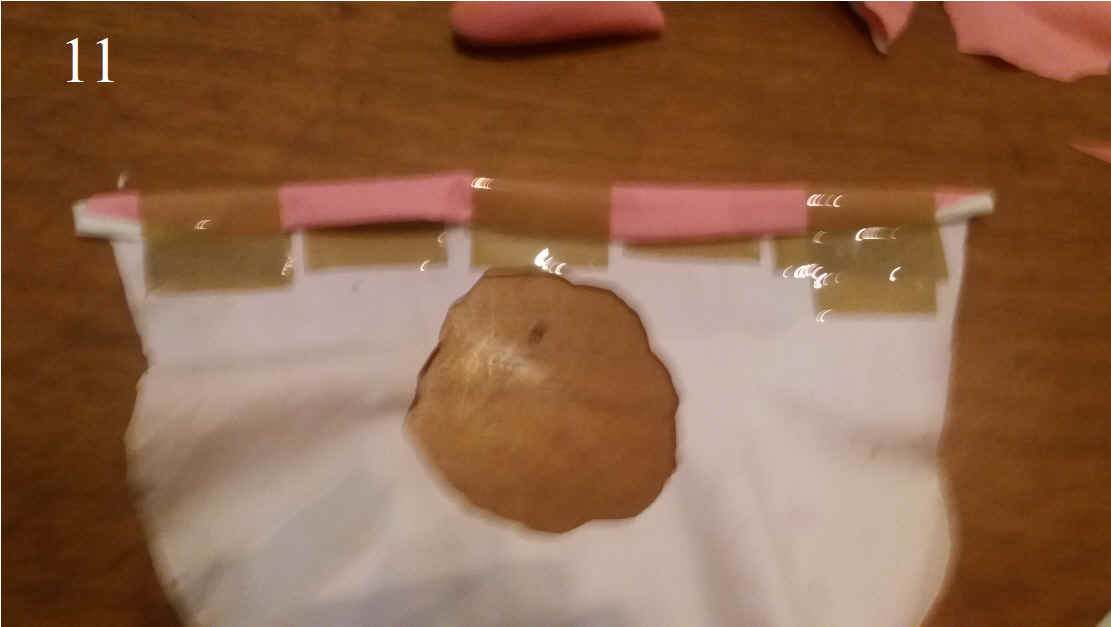
10 and 11 Shows how to strengthen the upper border of the mask by folding it over three times, always fixing the whole length with pieces of the plastic tape.
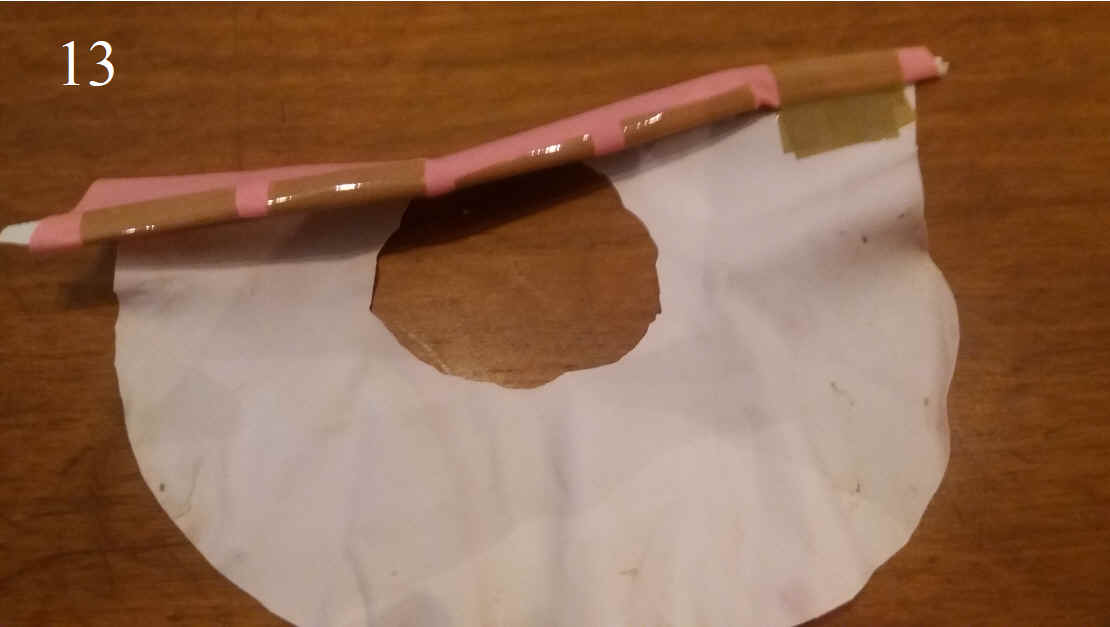
13 Pick up this construction and in front of a mirror find the positions where you need to work in a fold to match the mask to your face. Fix it with the masking tape.
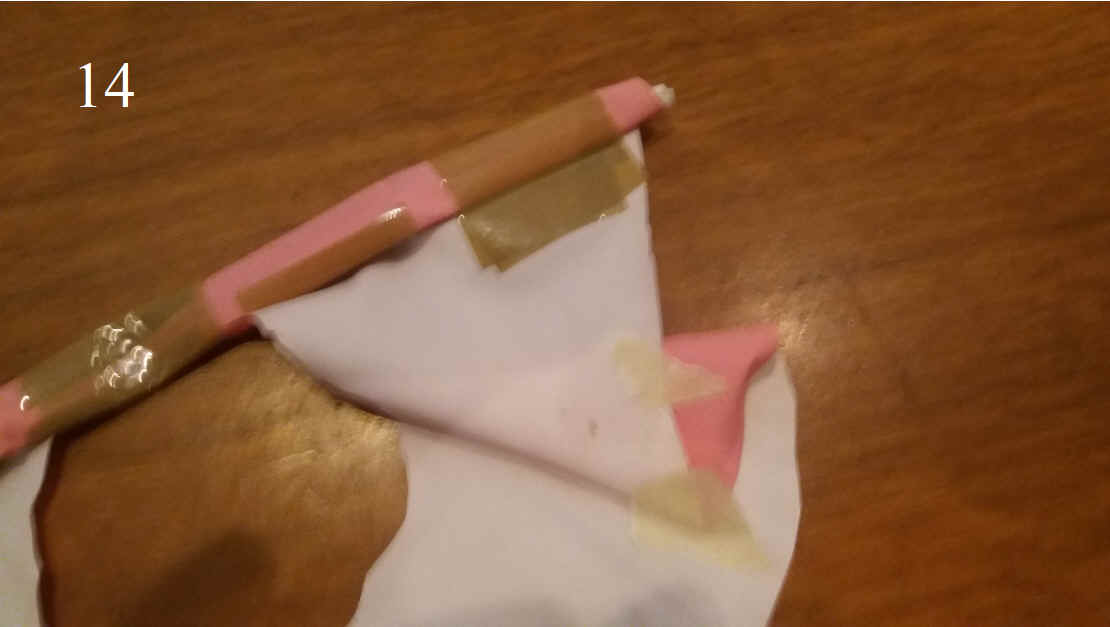
14 Shows the folding with the preparatory fixing with the masking tape.
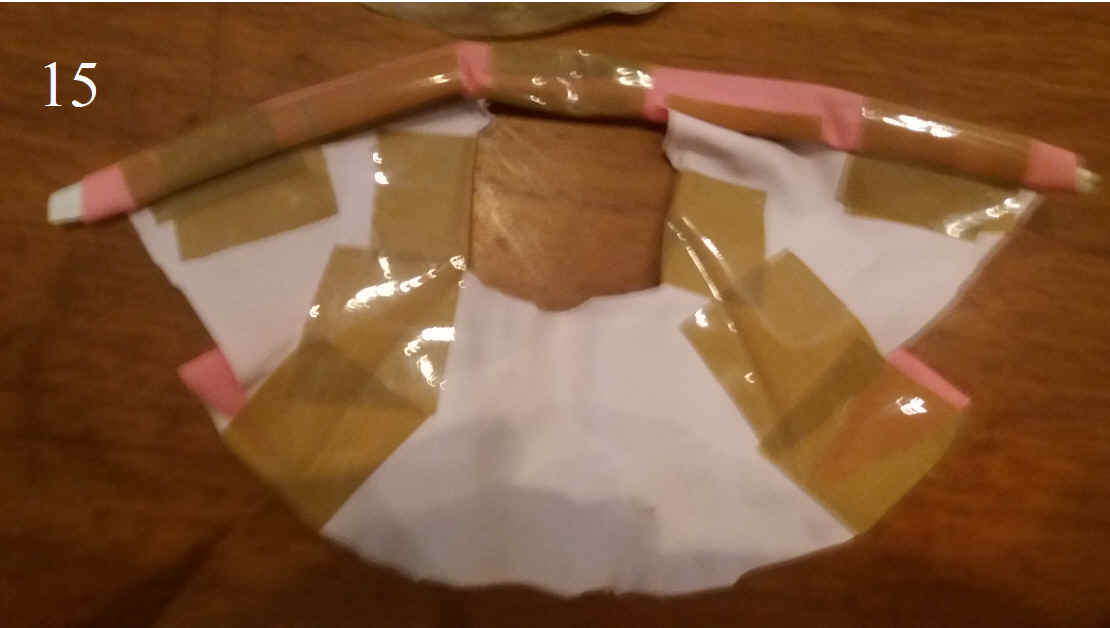
15 Strengthen the inside of the mask with pieces of the plastic tape
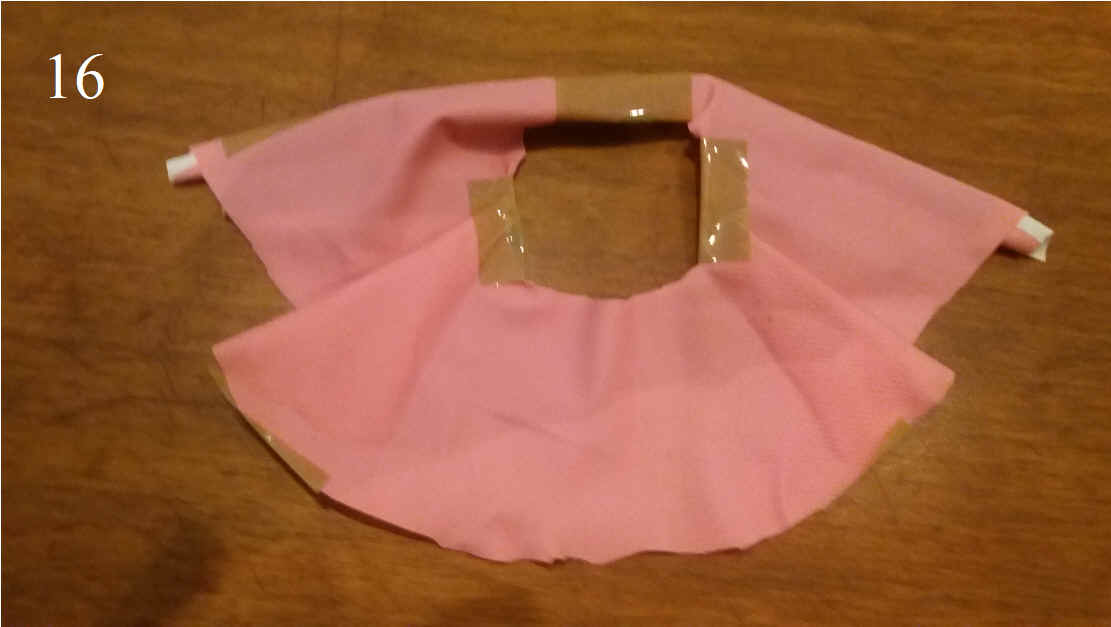
16 Shows the 3 strengthening’s around the hole. 17 The same thing with the filter put in place.
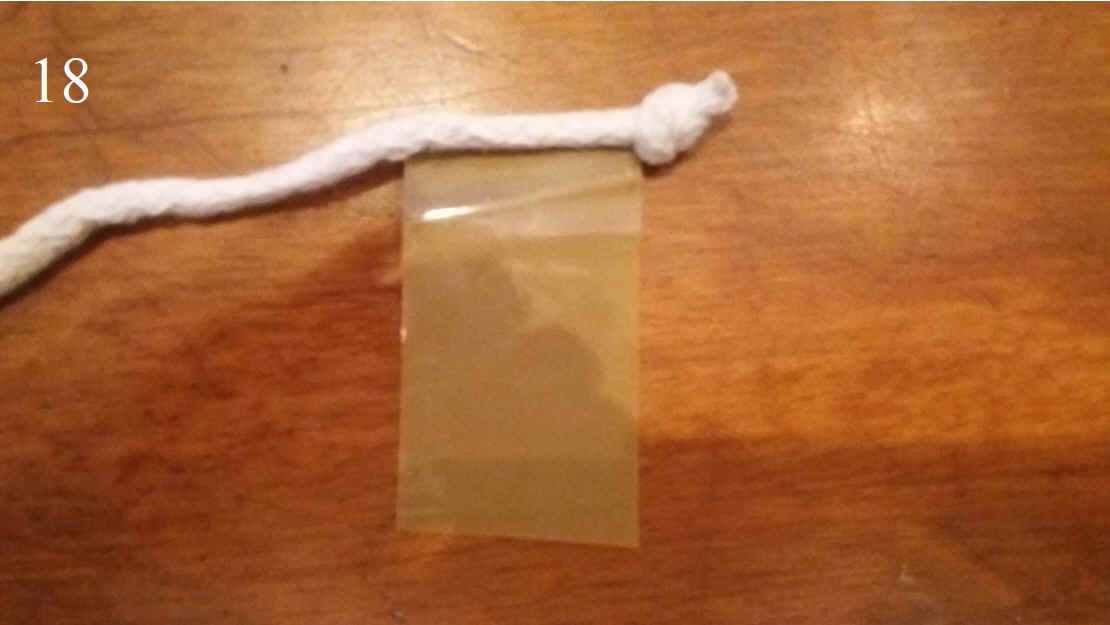
18, 19 The main fixing strings should have around 5mm cross sections – else use ribbons. They serve to fix the mask around your face with good solid pressure. Therefore make a knot on the end of the string and wrap the plastic tap 3 full turns around the string.
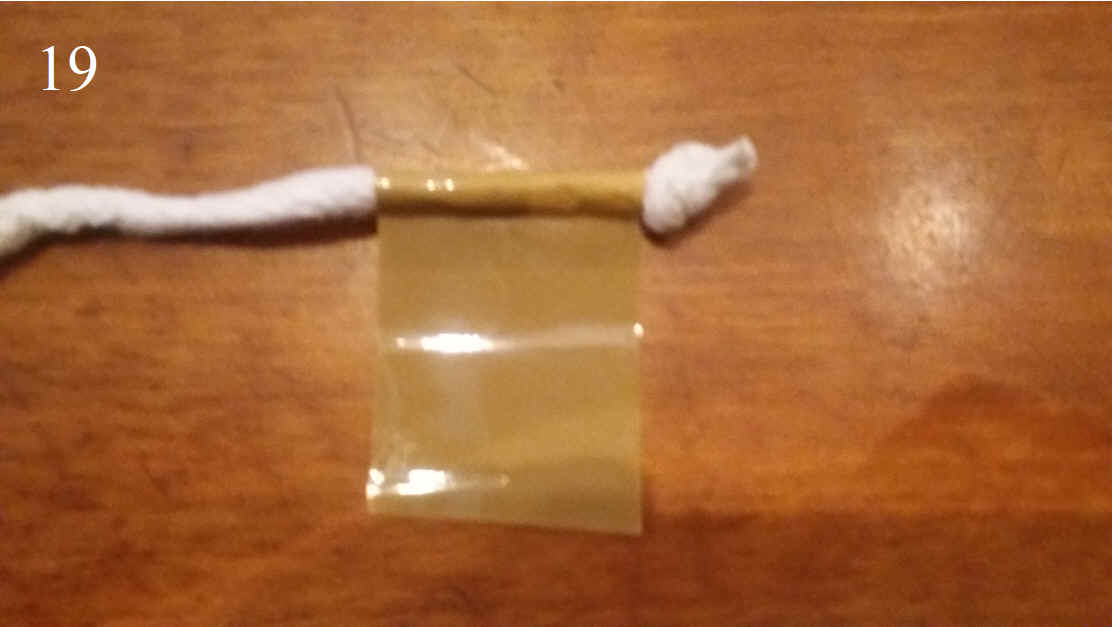
20 Stick each string (which have been wrapped with tape in the opposite direction) on the mask with the tape pointing away from you so that one third of the tape continues to the outer side of the mask. Strengthen the string by covering the assembly with a second piece of tape towards the bottom of picture 20.
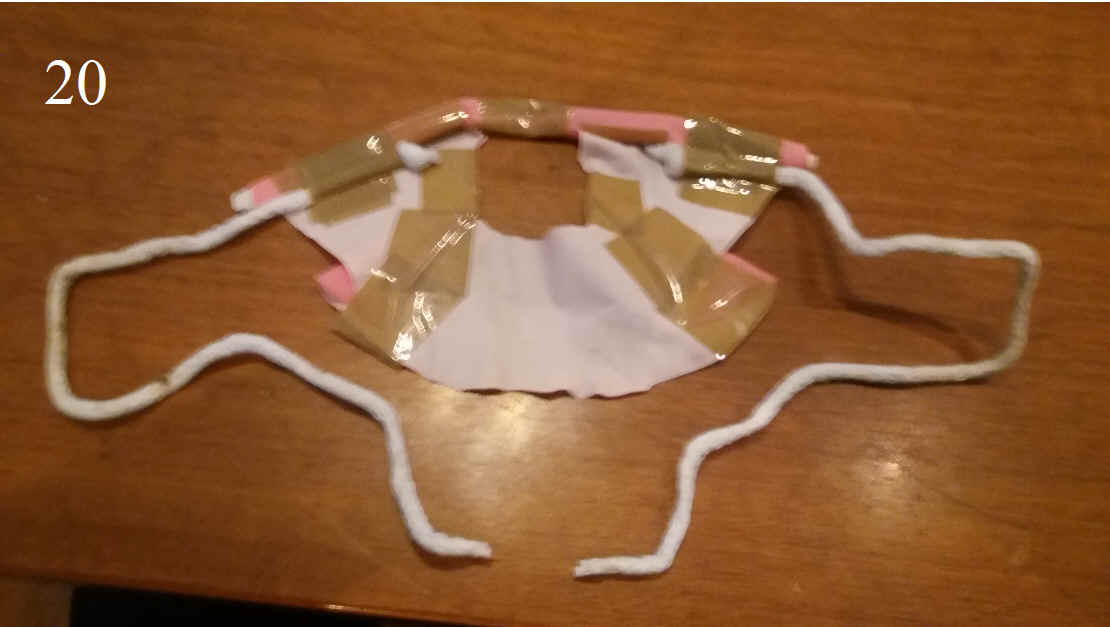
21 You can now make a selfie by trying out the mask. Find out at which positions you have to pull back the lower parts of the mask which still dangle around freely.

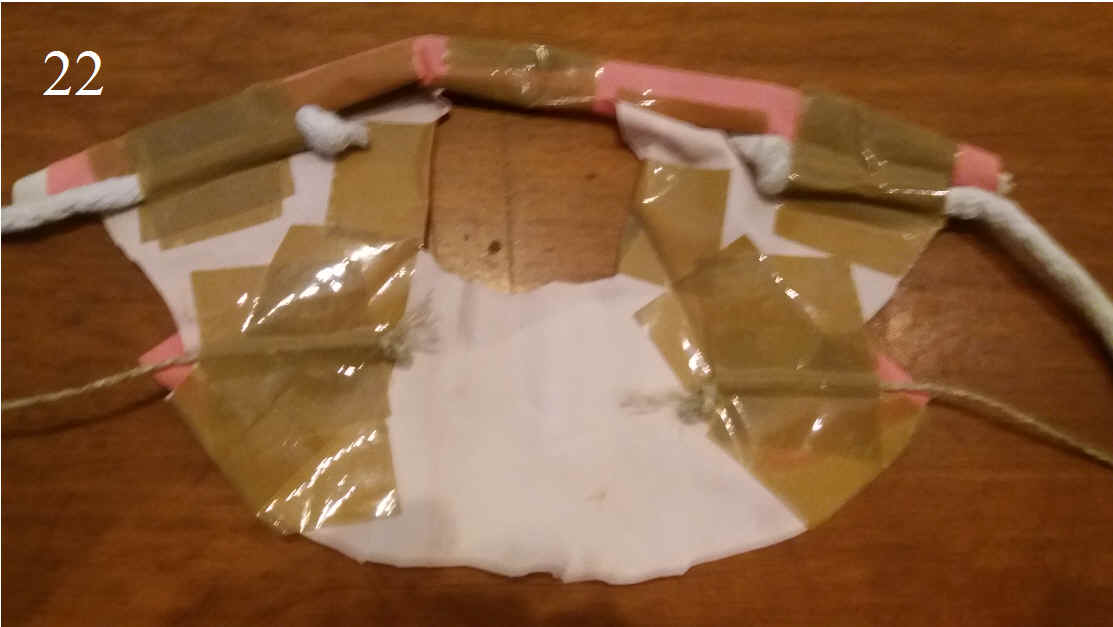
22 Attach two normal strings at these positions. Again having wrapped tape around their ends after having made knots to prevent them from gliding out. Secure these mountings again with plastic tape.
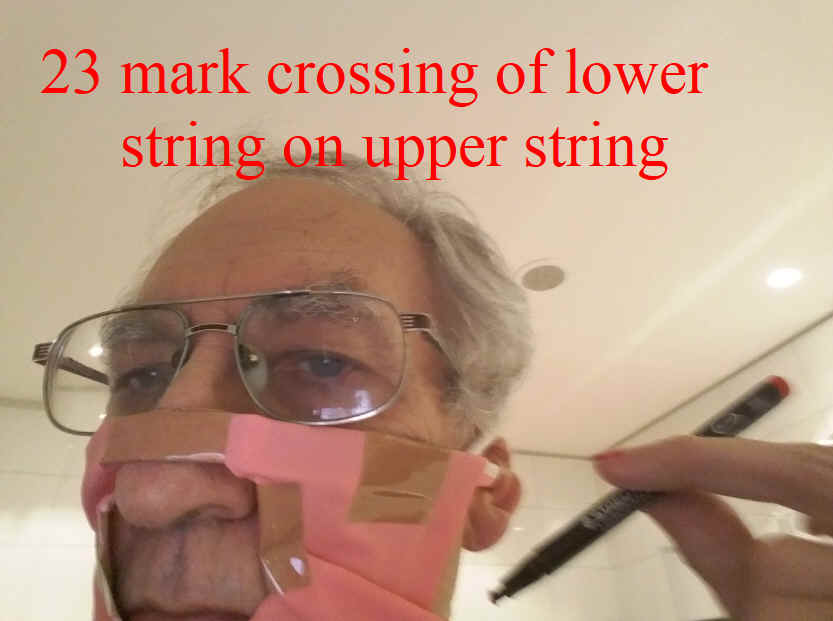
23 Put back on the mask tightening the main holding strings (5mm diam) and in front of a mirror find the positions where the lower string cross the upper strings so that the mask fits tightly on your face. Make sure that both the thick and the thin strings will bear a marking.
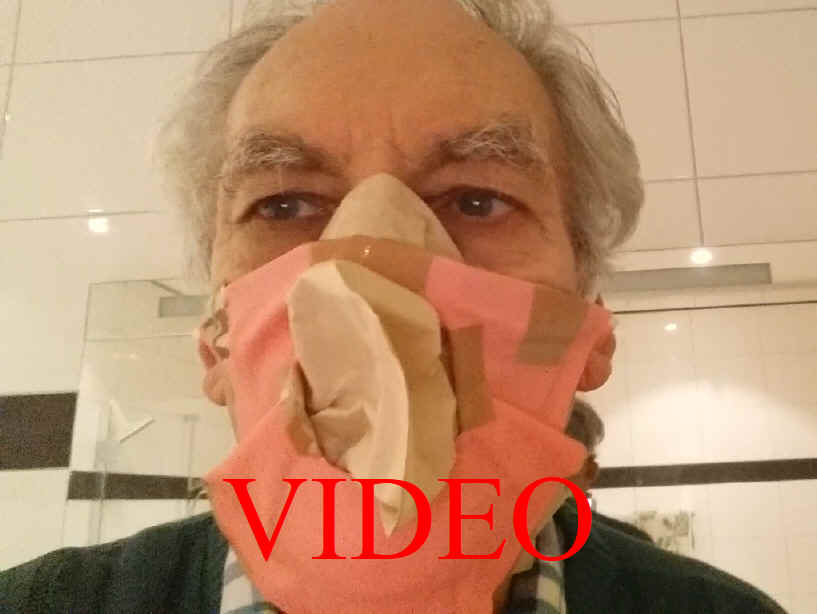
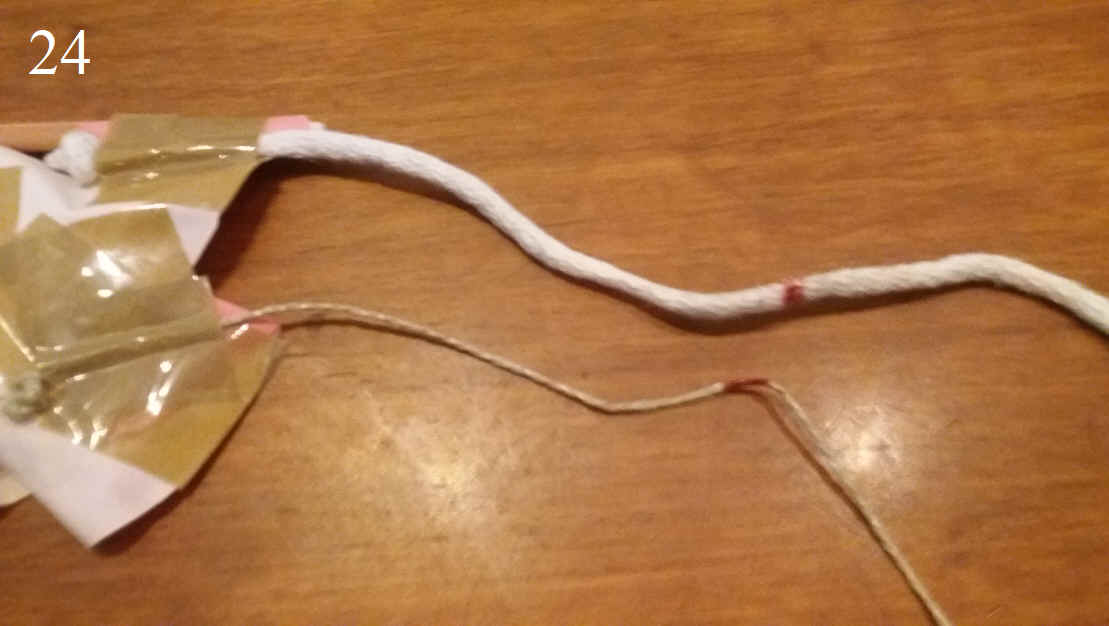
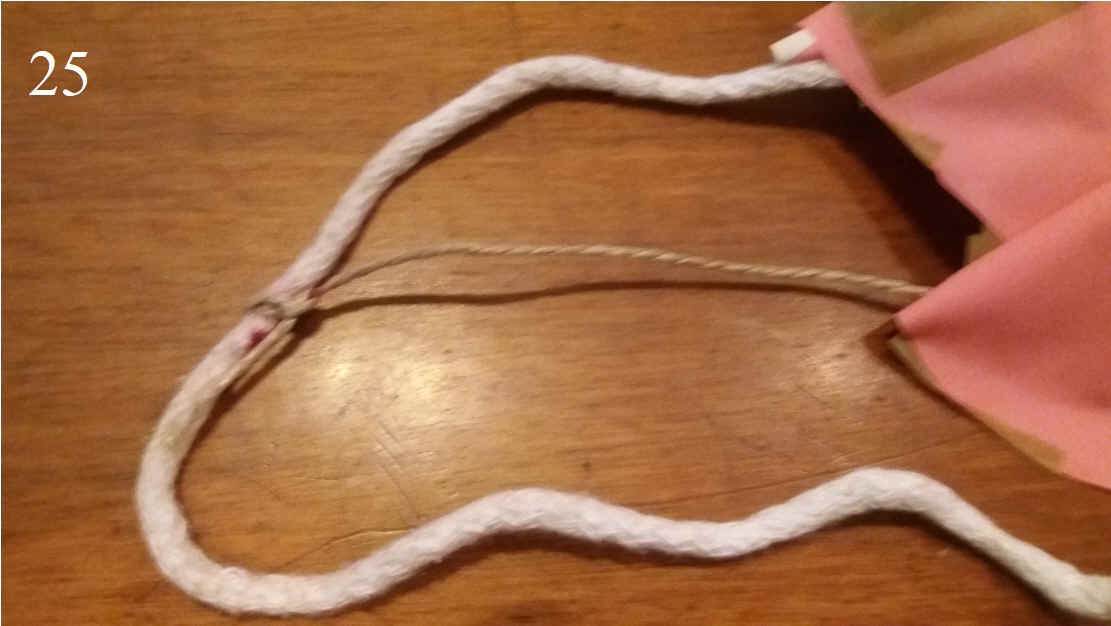
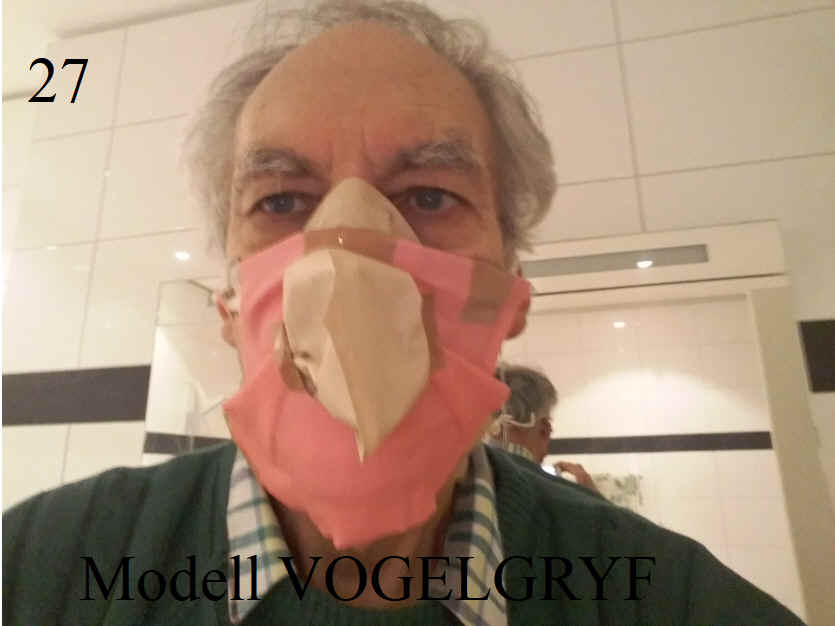
24 and 25 Knot the thin strings around the fat strings, making several knots. The thin strings should sit tightly but must still remain to be adjustable at will.
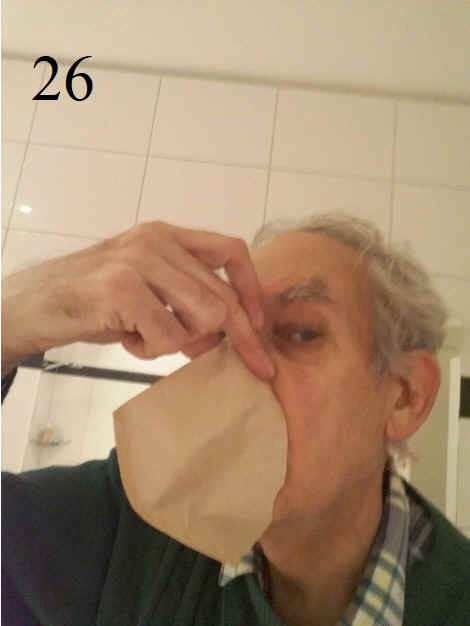
26 Shows the correct position of the coffee filter covering nose and mouth.
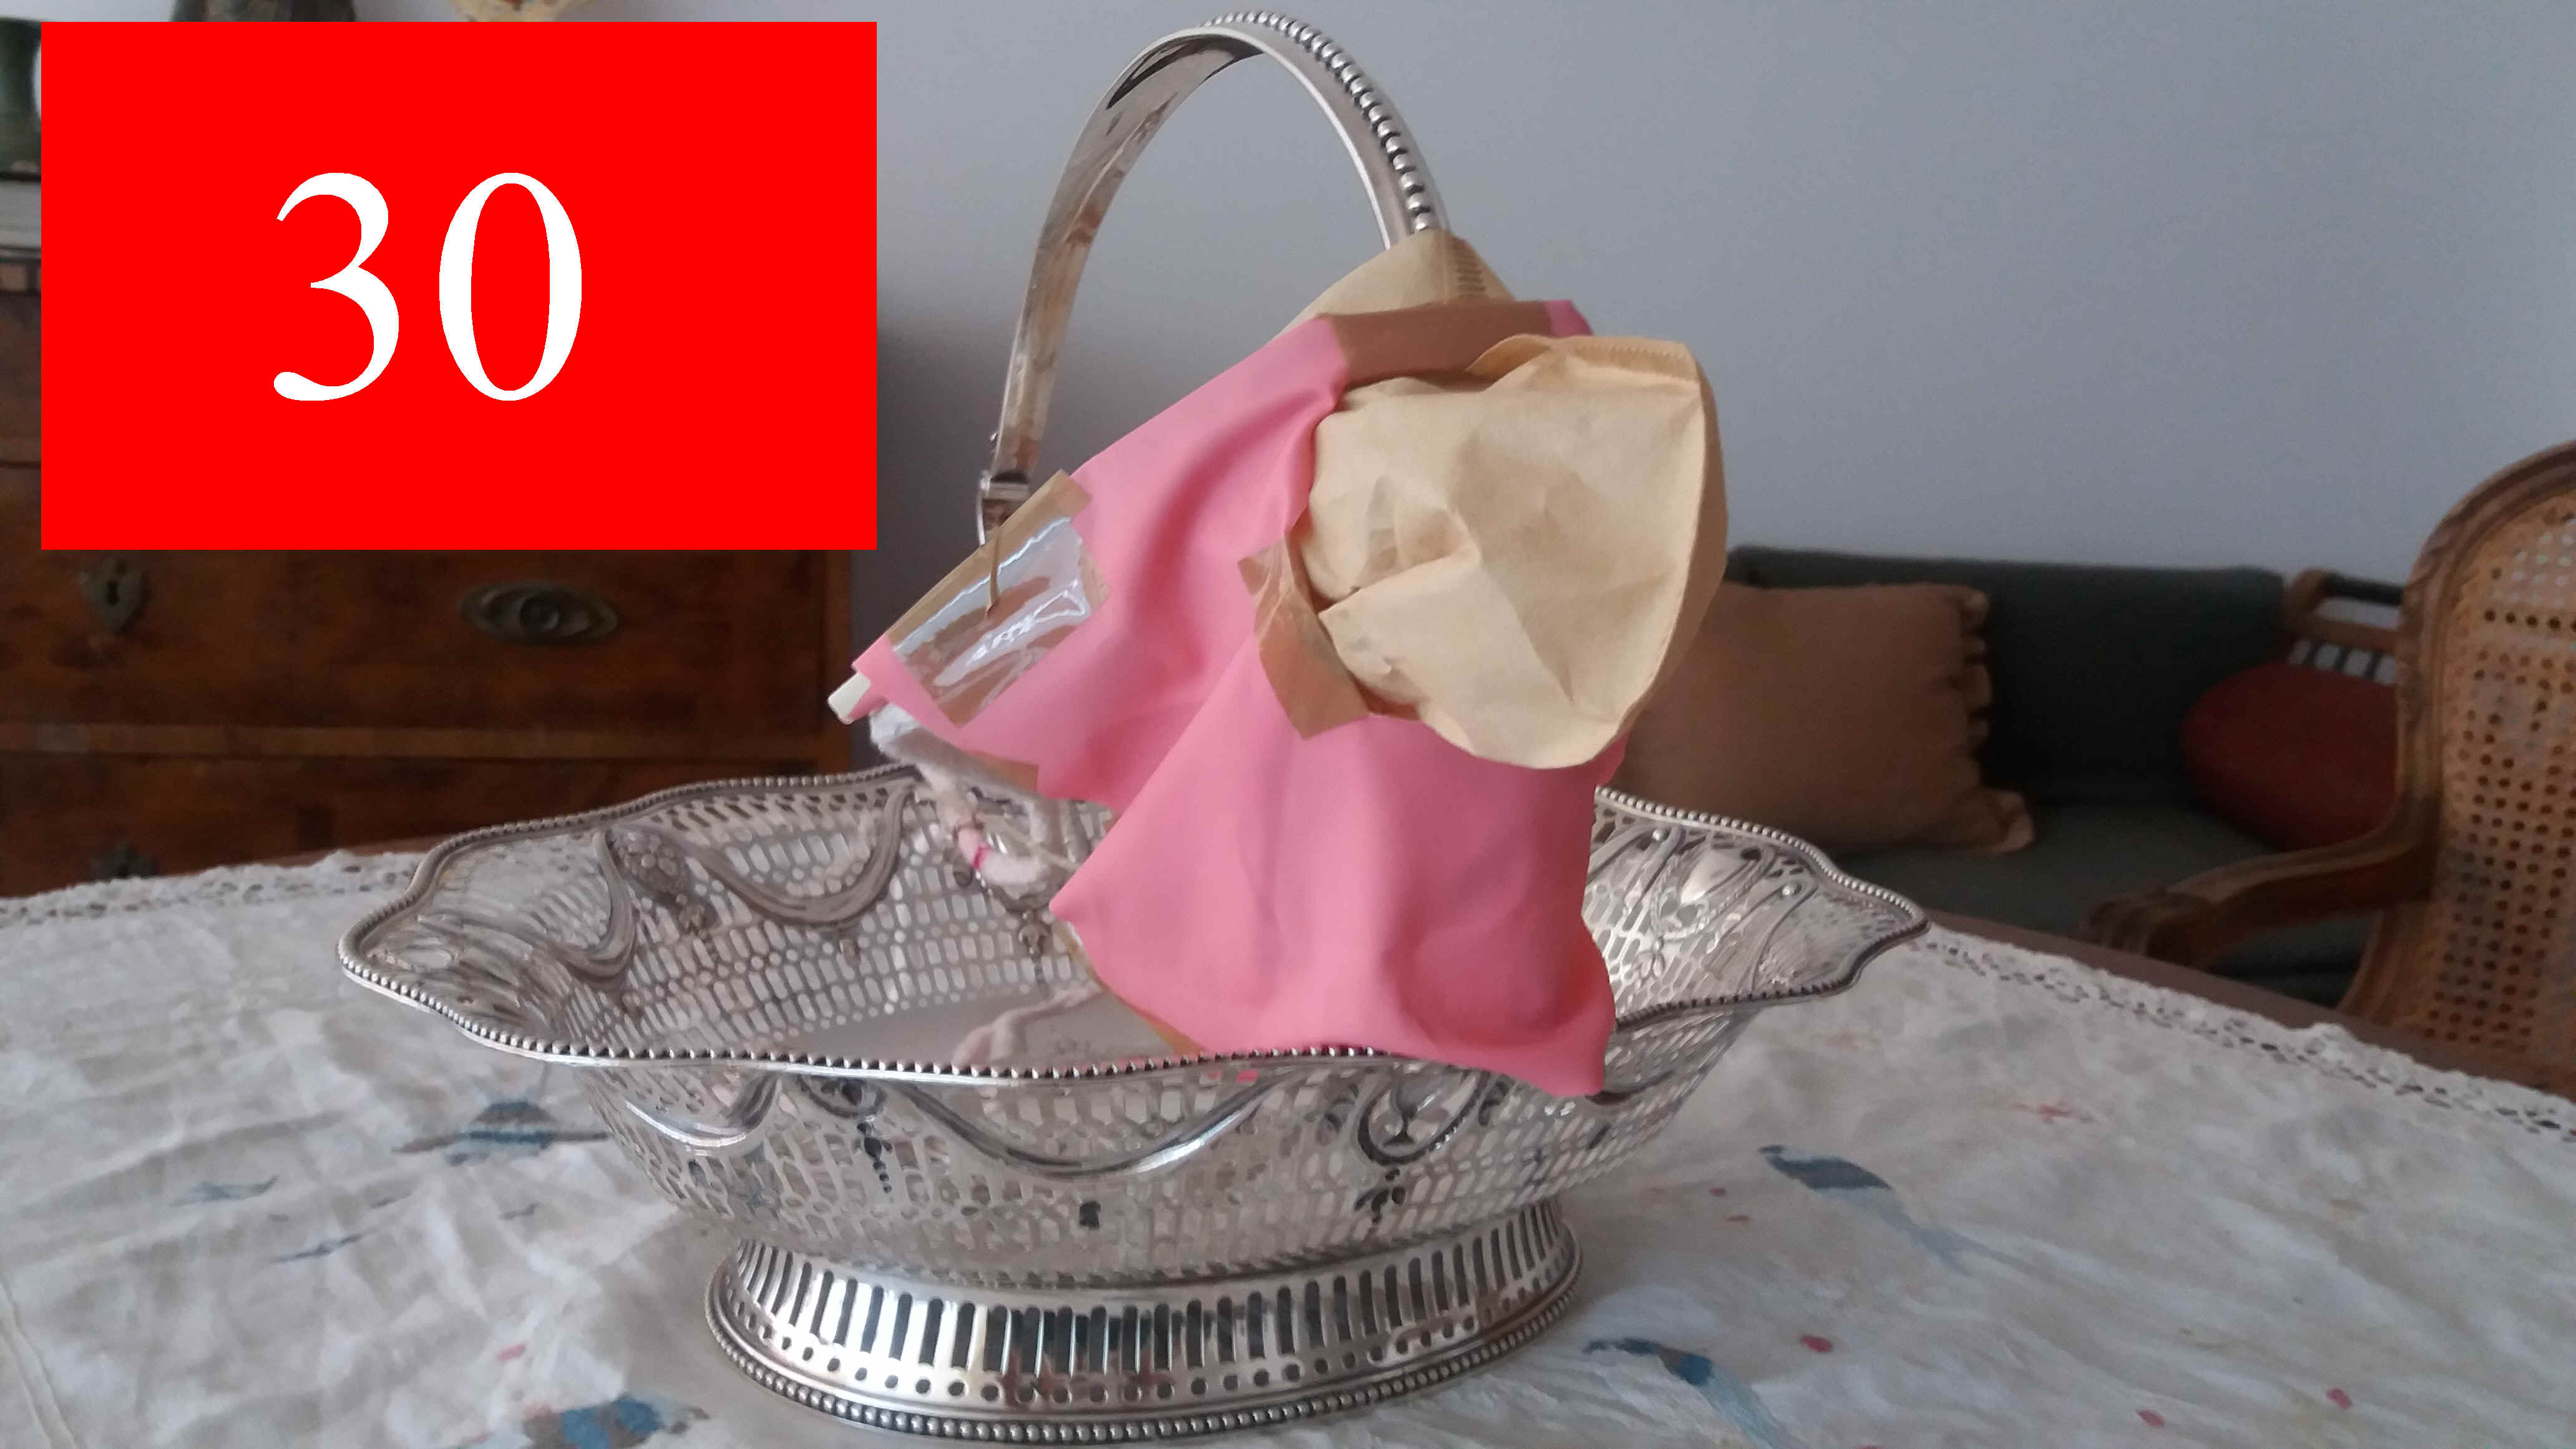
27 Shows that the round cutout in the glove tightly presses the filter against the face.
28 to 30 show some additional pictures of the finished mask.

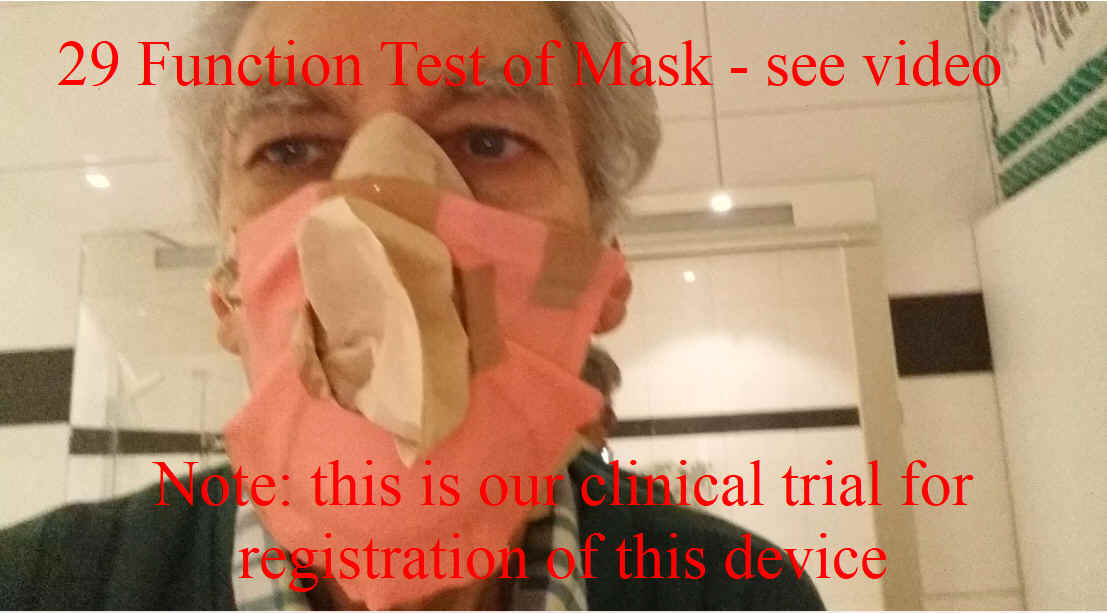
29 It is at this place very important to make a breathing test as shown in the video to make sure that all ingoing and outgoing air has to be pressed across the filter(s). You can also try if you still get enough air using two filters. See video in https://www.facebook.com/berchtold.rordorf
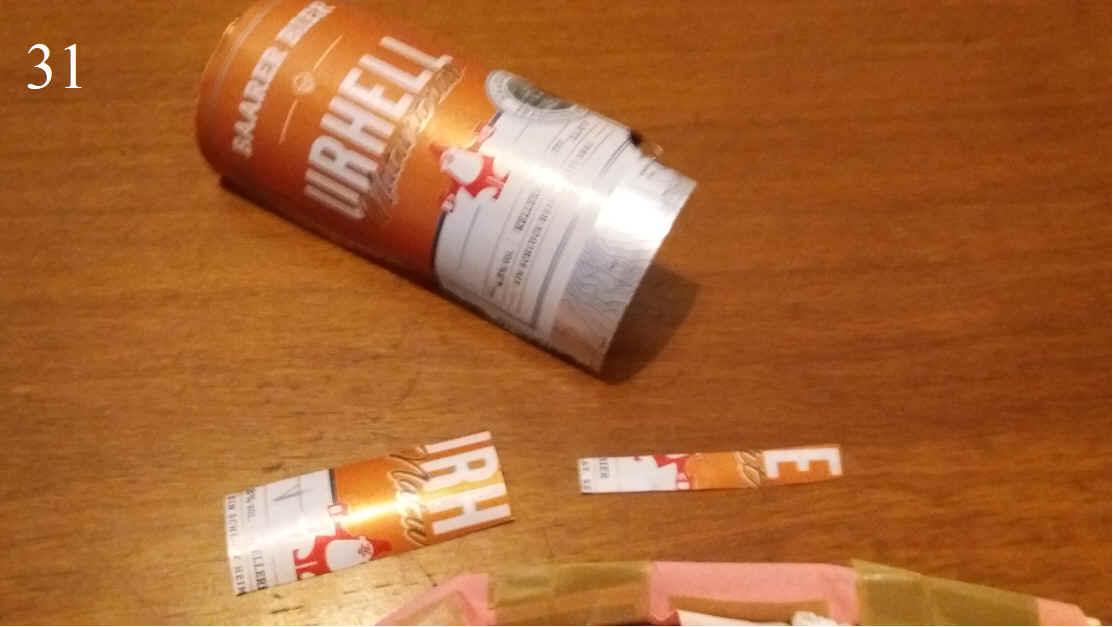
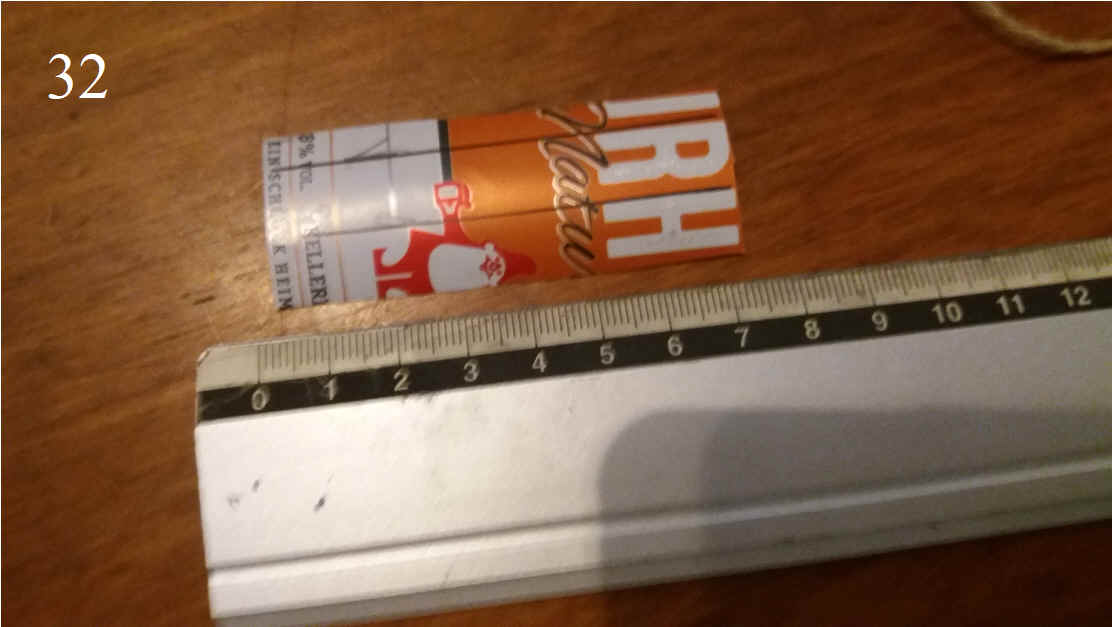
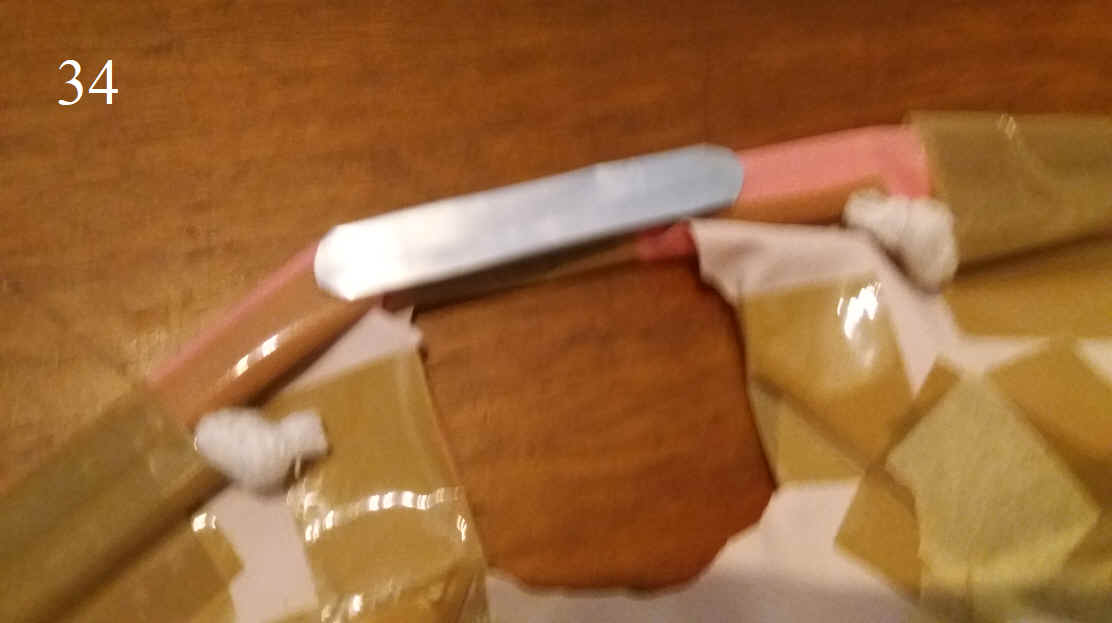
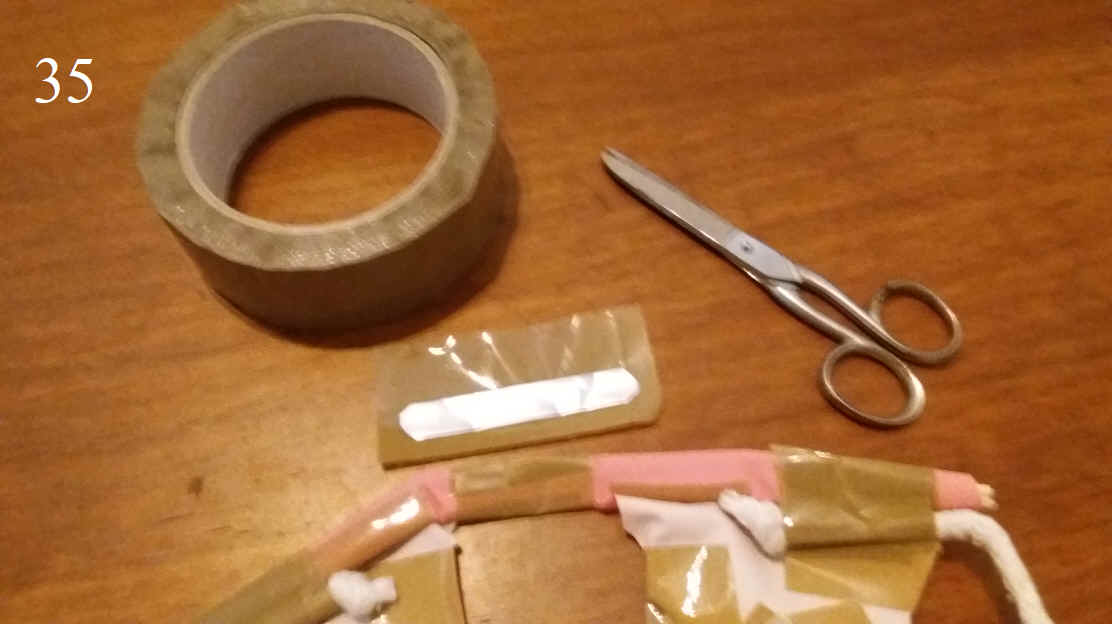
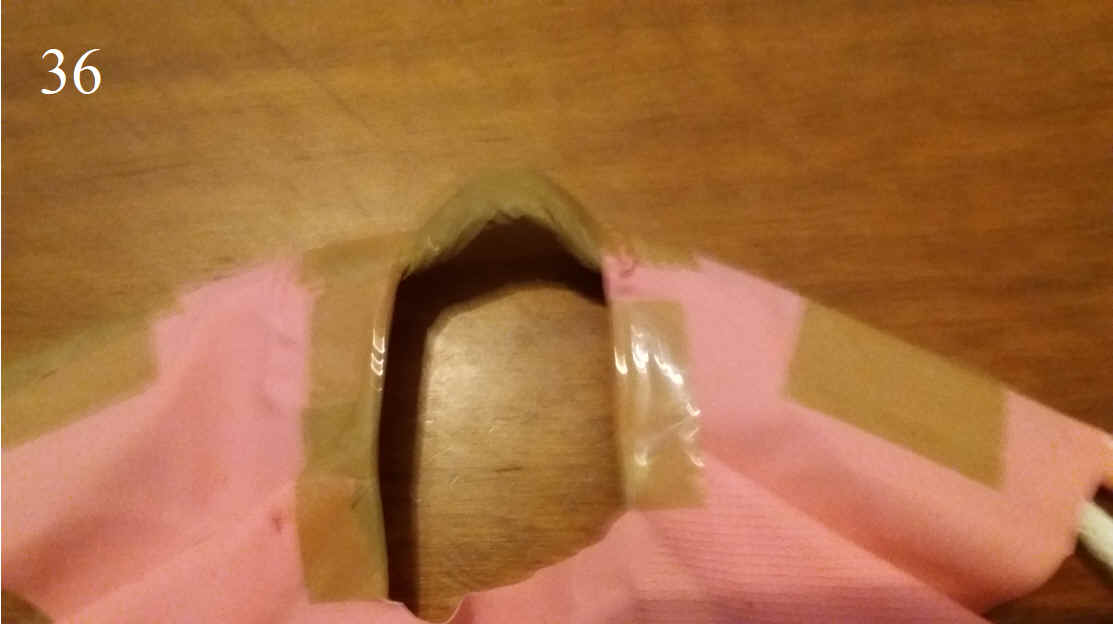
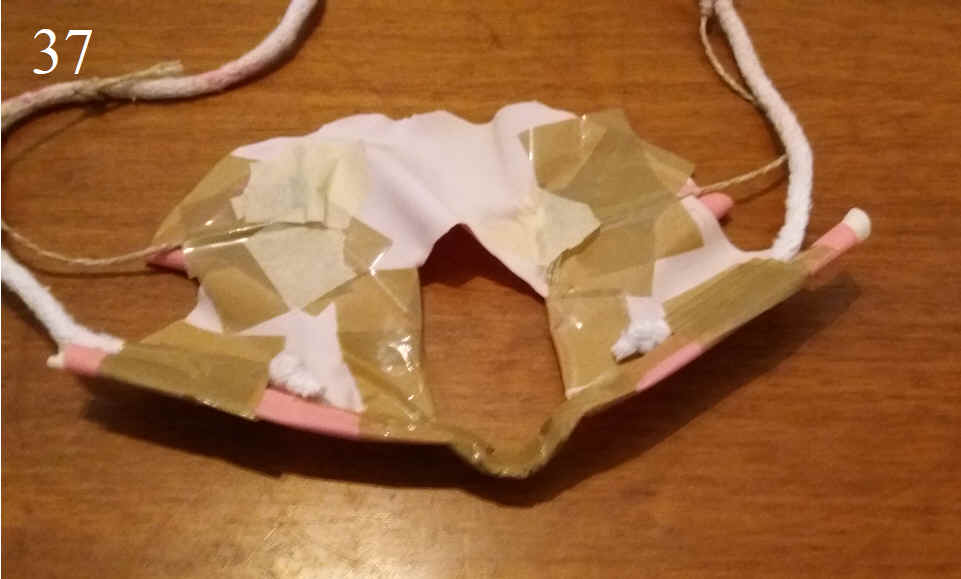
31 to 37 show how to reinforce the nose region with a “wire” type metal piece cut out of a beer can. Cut it out with scissors. Be careful not to cut your fingers with the sharp edges of the aluminum foil! The foil is then folded twice in order to reinforce its strength. The two ends are rounded with the scissors in order not to present sharp corners. This is then stuck to the outside of the nose region onto the mask with tape. Of course with the sharp edge of the foil pointing away from the eyes! Make sure to well protect all sharp edges remaining with tape.

Time to create and build the mask: 2 hours. Time to prepare the pictures and the text for the publication: the whole rest of the day. Has also beeen posted on https://www.facebook.com/berchtold.rordorf and has been sent to deza@eda.admin.ch and deza@eda.admin.ch