course#3 -
Restoration and building of
DRY-WALLS USING FIELD
STONES AND LIME
The castle is located 34 meters above the ground water level and
formerly all drinking water had to be pulled from the draw-well lifting it up 34
meters! You can imagine that this was not feasible to give water to the animals.
All water from the roofs was therefore carefully collected and for the humans
led into a high lying closed draw-well. For the animals the following open
well was used. All of the farm buildings around this pool have wedge roofs
sloped towards the court. The court was completely paved with a side walk
along the buildings and a gentle slope towards the reservoir.
It
is interesting that this basin of a depth of 2 meters is tight while the dry
dungeons having a depth of 3.50 meters are not. It turns out that
the layer of clay covering the limestone bedrock has a depth of just about 3
meters. This natural geologic property was thus made use of to build both
the reservoir basins and the dry dungeons of the castle. The following
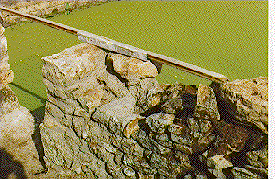
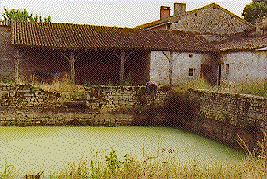
pictures show that this early 18th century basin was in very bad shape and in
particular the back wall was ready to fall down completely. The original walls
are earth bound only, as lime concrete was a luxury at the time for such a
utilization. As such walls are exposed to rain, it is no surprise that most of the original reservoir walls
have long since disappeared. The present wall did only survive as it is
protected by a top layer of big plates. These plates are now missing,
however, explaining why this wall was about to fall down.
- I prepared the work by applying herbicides (Na ClO3) halve a year before
the work. Mainly the insides of the walls were sprayed.
- In spring and in summer I removed all of the weeds on the walls.
- All old junk lying around from the former owners was then removed.
The bigger loose stones risking to fall down were removed as well.
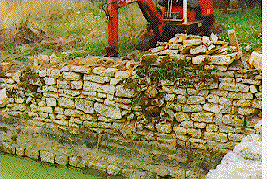
- The right side back section as seen from the pond was severely bulged
towards the pond and had to be straightened.
- This step was done very carefully with the earth mover equipped with the
widest spoon. The spoon was carefully placed on certain stones and
these stones were then very carefully pushed in (from the inside of the pond
towards the outside). With due care a stone can easily be pushed in by
a little as halve a centimeter.
- This operation was done from bottom towards top of the wall. This
permitted to save the old wall to a maximum and this is of importance in
view of the fact that it is almost impossible to exactly reproduce the old
walls. We just do not have the years of experience people of the 18th
century had which did nothing else than build dry walls.
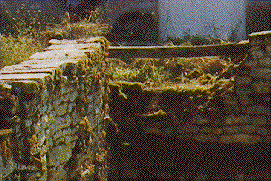

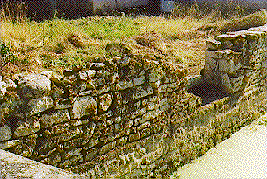
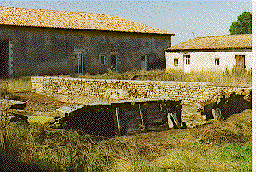
- The previous far left picture shows that the right side corner was missing
completely and had to be rebuilt.
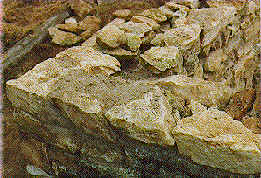
- In the corner areas it is important to constantly create keys by
interlocking the stones coming from the two sides on the inside walls.
On the outside corner very nice and even blocks must be used of
course. I always keep candidates for such locations on a separate
pile.
- The left picture shows a section of the corner after finding an initial
fit of stones. This illustrates the importance of finding keys binding the
two halves of the wall at regular intervals.
- The remaining holes on the inside of the wall are of course filled with smaller stones
again trying to find perfect fits and keep the use of lime concrete to a
minimum.

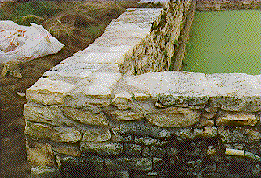
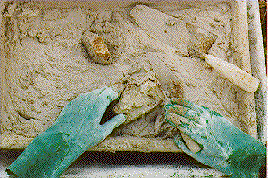
- The following series of pictures demonstrates my technique of building
lime bound dry walls. This technique permits to fully seal the
walls with lime yet keep the interstices between the stones to a minimum.
I
found this to be the best way to reproduce the historic earth bound walls
and still obtain a completely lime bound wall.
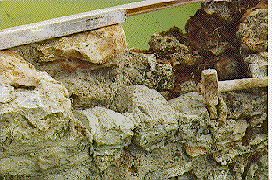
- I first try to find a layer of fitting stones as shown on the picture
above.
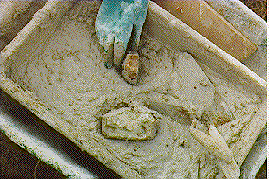
- I then lift off stone after stone and trench the chosen stone in my lime
mixture while keeping the outside part of the stone off the mixture. A
masons shovel can be used to make sure that the lime makes a perfect contact
with the stone. The preparation of the lime
mixture has been described in lesson 3 of the second course
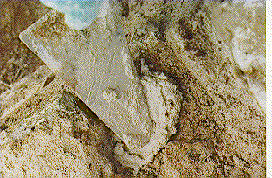
- Some lime is also placed on the seat of the chosen stone.
- The stone is then placed exactly in the same position as when lifted off
and is hammered down into position in order to squeeze out the spare lime
mixture.
- The big covering plates of the the wall section to be repaired were
missing. This same technique was therefore also used to do the top finish in order to protect the
wall from rain.
