|
|
PUBLICATION |
|
THE PRESENT PUZZLES HAVE BEEN DESIGNED AS A CBT (COMPUTER BASED TRAINING) FOR ENHANCING IMAGINATION IN THREE DIMENSIONAL SPACE
The poly cube (PC) and poly ball puzzles (PB) have been created and published in 2015 at the Musée Suisse du Jeu in la Tour de Peiltz (next Vevey on the lake Geneva in Switzerland). Prototype wood models have been presented during this conference. As the prize of the puzzles would be prohibitive in form of wooden puzzles, we have virtualized the puzzles using WEBGL (web graphic language), JAVASCRIPT and SVG (scalable vector graphics). This choice has the advantage that these scripted programming languages are widely standardized and run on most modern internet browsers. The puzzles are thus highly transportable and run on all personal computers or mobile phone devices. The individual program files can indeed be copy - pasted to any such device and opened off-line with any of the tested browsers (the MS internet explorer, however, distorts the objects in VR mode). No APP is thus used. Any text editor such as the Microsoft Notepad used in UTF-8 mode can be used to open the program files. Likewise any browser can of course also be used by selecting view source after a right mouse click on the opened programming page. I am personal still using MS FrontPage to do all my coding along with the developers version of the Firefox browser which provides a WEB console for debugging. . No include files have been used in order to provide a full transparence of the code used for students. Comments have sporadically been included, although not in a systematic educational fashion.
This work was undertaken as an working example of the excellent book WebGL Programming Guide, by K. Matsuda and R. Lea, 2015, Adison-Wesley, ISBN 978-0-321-90292-4. These puzzles can be used as a computer based training method for improving the three dimensional comprehension, a faculty which is of great importance for pupils of natural sciences, technology and engineering, architects and many more. I am personally a physical chemist and know well of the meritse to have a 3D mental vision!
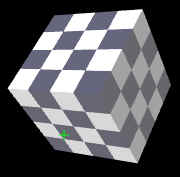
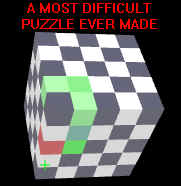
Two types of three dimensional puzzles are treated here, poly cube and poly ball puzzles, as described in the mentioned publication. The puzzles are built up of assemblies of individual clusters going from monomers to pentamers in case of the poly cube puzzles, and from monomers to tetramers in case of the poly ball puzzles. Various assemblies of the poly cube clusters allow to build up 2x2x2 to 6x6x6 edged poly cubes. The poly cube puzzles are far simpler in principle and should be studied first as there is a direct match between the orthogonal system of the computer screen and the orthogonal system of the coordinates of a poly cube. The right handed orthogonal system of the computer screen consists of the x-axis growing from left to right in the horizontal direction, the y-axis growing from bottom to top in the vertical direction and the z-axis growing from the computer screen to the viewer, thus forming a right handed orthogonal coordinate system. The 2x2x2 poly cubes are trivial to assemble but should be looked at in spite of this, as they are well suited to get familiarized with the graphical user interface and the translations (movements in z-, y-, and x- direction) and rotations (about the object based z-, y-, and x- axis) of the individual clusters. They also permit to illustrate the difference of a particular physical solution, say built up of wooden poly cube clusters and virtualized equivalent in a computer. In the latter every constituting monomer cube has its own identity, coordinates and spatial rotations, which translate in to different model matrices and differences in the files of stored solutions. The 3x3x3 poly cubes are easy puzzles too, including the famous soma poly cube puzzle invented by Piet Hein. The larger poly cubes are more challenging to find solutions and th 5x5x5 cube, as defined here, may well be one of the most difficult to solve puzzle ever introduced. Indeed I worked during two solid month to find a single solution! The 6x6x6 cube is easier again as it contains small clusters.
Exercises on poly cube assemblies and looking at the multiplicity of solutions with computer virtualizations.
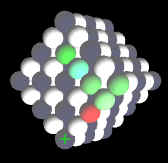
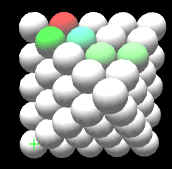
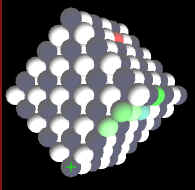
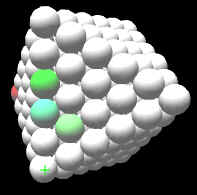
Lets first do some exercises using poly cube assemblies as the three dimensional coordinate system of these puzzles is orthogonal and is thus far simpler as for the poly balls. There are several goals of these initial exercises: to familiarize with the graphical user interface, to learn how to translate (move clusters around in space) and rotate (rotate clusters around their z-, y-, and x-axis), how to see the scene from different directions (tilt the view or rotate it around the world y- axis in 45 degree steps), how to store solutions in order to repeatedly save the progress when working up a solution, how to call up a programmed solution and how to map a final solution. Several small, 2x2x2 or 3x3x3 poly cubes have been prepared for these exercises and the should help to familiarize the user with the different clusters of growing complexity going from a single cube over linear, to flat (PC_1F, PC_2F, PC_3F, PC_4F, PC_5F and PB_1F, PB_2F, PB_3F, PB_4F) to three dimensional (PC_4T, PC_5T and PB_4T) and finally to raceme pairs (PC_4R, PC_5R and PB_4R) (mirror images of three dimensional poly cube or poly ball assemblies which do not have an internal mirror plane - have a look on your left and right hand: they form a raceme pair). The nomenclature used of the poly cube (PC) and poly ball (PB) clusters is indicated in brackets. These exercises should most importantly train the student to learn to comprehend the three dimensional structure of the clusters and their interaction in space
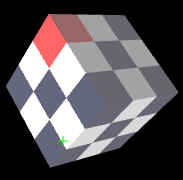
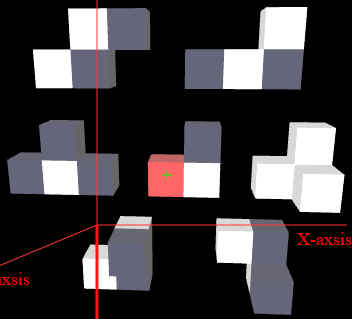
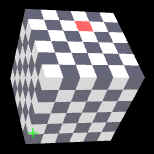
The poly cubes are built up layer by layer starting with the lowest layer on the monitor in x- and y- direction. Each additional layer is added in the z-direction towards the viewer. A finished poly cube is mapped by clicking ALIGN and then typing MAP into the File Text field and clicking the canvas ( or alternatively by typing PLAN into the File text field and clicking the canvas and then typing MAP into the File text field and clicking the canvas). In the mapped solution the different layers are shown starting with the top layer going in direction away from the viewer to the bottom layer. The solution - MAP is thus also shown from top to bottom on the monitor. The finished cube is thus shown on the monitor looking from top down onto the cube standing on the monitor. It can be tilted down and up by repeatedly clicking Tilt , thus turning the assembly around the x-axis of the monitor. The assembly can also turned by - 90, - 45, + 45 or + 90 (degrees) around the y-axis of the monitor (world axis rotations). The first cube, of the first cluster listed in each puzzle, is shown in red in order to facilitate the orientation. Whenever a cluster is selected / activated for translation or rotation operations, it is shown in green: the first cube in intensive green, the second cube in blue green and the remaining cubes in light green. This sequence of coloring helps to keep the spatial orientation for rotating operations about the z-, x- and x-axis of the chosen poly cube cluster (model axis rotations). All necessary rotations of poly cube clusters are limited to + or - 90 degrees, or 180 degrees rotations abound the model z, or y, or x-axis. The following simple poly cubes have been designed for the tutorial in order to become familiarized with the more complicated three dimensional clusters. All of the possible clusters up to pentamers, including some doubles (...bis), are listed when clicking the HELP button.
Let us start with the 2x2x2 poly cube puzzles. First a word on the notation: PC stands as mentioned for poly cubes, PC_2x2x2 indicates shat the assembled poly cube will measure two cubes each, in the x-, y- and z-direction of the model coordinate system; cl followed by a number, finally, indicates the particular cluster(s) treated in the example. Have a look at WEBGL_PC_2x2x2_cl1_2_2_4 which contains clusters 1, 2, 2bis and 4 and try to build up this very simple puzzle to get a 2x2x2 cube. It is important to realize that there is a major difference between physical, say wooden or plastic, poly cube assemblies and virtualized equivalents on a computer. Positions matter in the computer version and different positions for one and the same solution can be mistaken as different solutions, as each position has its own particular model matrix describing the assembly of clusters. Lets have a look at the following examples WEBGL_PC_2x2x2f_cl26, WEBGL_PC_2x2x2c_cl10, WEBGL_PC_2x2x2d_cl11, and WEBGL_PC_2x2x2e_cl12, which each permit only one solution. Each of these puzzles has indeed 24 positions: each of the 2x2x2 cubes can be positioned on 6 different surfaces (start, top, left, right, front and back face). In addition each of these 6 positions the 2x2x2 cube can be turned into 4 different positions by turning the assembly by 0, 90, 180, or 270 degrees about the z-axis (note object turning is around the z- axis as the monitor is treated as the floor on which the solution is built up).
Right click and open in a new tab the puzzle
WEBGL_PC_2x2x2f_cl26 . The
scroller to the right of the button called Block, will show a 1 after the first
opening. Change it to S=Sol. and move the mouse over the canvas - the
clusters will jump into the unique solution of this puzzle. Now click the
button Align, then type MAP into the text filed next to File and then
click the canvas. A mapping of the solution will appear below the control
buttons followed by a listing of the solution. Each cluster is listed with the
model coordinates for each of its constituting cube, along with the x-, y-, z-
rotations of the listed cluster. Note, the mapping is done layer by layer in
horizontal x- and vertical y- direction, for z- = 0, z- = 1, and so on,
where the z- direction increases in direction of the viewer looking at the
monitor. Now have a look at the content of the above mentioned scroller. The 24
possible positions of the unique solution to this puzzle are listed in the
order of the initial solution S, followed by flipping to the right, left, front,
back and top, with interleaved turns by 90 degrees clock wise to 90, 180, and
270 degrees. Choose some positions and observe the 2x2x2 cube by selecting
the clusters and turning / tilting about the world coordinates. Also
observe the different mappings by clicking Align and typing MAP into the text
field. As an exercise write out a mapping and try to reproduce some flips
and turns of various positions of the single solution. Always click the
Erase -> Store -> Text buttons in this order and observe the
typed out text field which represents the repositioned solution of the puzzle.
Things get far more complicated with the
seemingly very simple puzzle
WEBGL_PC_2x2x2a_cl8, which
combines twice the cyclic flat tetramer piece. Looking at a solid wooden
model, only one solution seems to be possible to form a 2x2x2 poly cube.
This object can then be flipped and turned as in the case discussed above.
Things are indeed far more complicated, as the constituting cubes of the
tetramer clusters are numbered from 1 through 4, a fact which destroys the four
fold symmetry of the clusters. In a virtualized model using matrix
calculus the numbering is of course essential. Our clusters are checkered
black and white, which reduces the symmetry of the clusters. Only two of
the possible four relative positions are valid, therefore, to create a
solution when turning one cluster against the other one around its four fold
symmetry axis. Either one of the two clusters can, however be flipped by
180 degrees about the x- or y- axis, which inverts the numbering from counter
clockwise to clockwise. We thus land up with 8 and not 2 possible
solutions in the virtualized model. All of the 8 solutions have been included in the
bottom of the scroller listing. You may
note, that sometimes rotating the clusters around the four-fold axis seems
impossible due to gyro-locking. In this case flip the cluster by 90
degrees about the z- or y- axis, then turn it around the four-fold axis and
finally flip it back in reversed direction around the z- or y-axis.
The non flat, three dimensional (WEBGL_PC_2x2x2c_cl10), the racemic ( WEBGL_PC_2x2x2d_cl11 and WEBGL_PC_2x2x2e_cl12 ) tertramers and only the clusters 25 and 26 ( WEBGL_PC_2x2x2f_cl26 ) of all pentamers can be used to build a 2x2x2 poly cube. WEBGL_PC_2x2x2b_cl4_11 is a special case of the racemics 2x2x2d as one of the two clusters 11 is included as an assembly of cluster 4 plus cluster 1, thus bringing in a second solution. Please note, that a change of coloring pattern is in most cases needed when using twice the same cluster. Two clusters 10 can be fitted to a 2x2x2 cube, but one cluster must have an inverted coloring pattern. The racemic pair of cluster 11 plus cluster 12 can not be assembled to a 2x2x2 cube. However, for both of these clusters an identical pair each, can be used. Please note that the resulting 2x2x2 cubes of WEBGL_PC_2x2x2d_cl11 and WEBGL_PC_2x2x2e_cl12 form again a racemic pair and are thus mutual mirror images.
Several 3x3x3 poly cube puzzles have been prepared in order permit to test the individual three dimensional pentamer clusters, along with some of the flat pieces which have few internal symmetry elements. The famous Soma cube of Piet Hein has also been included here. The 3x3x3 poly cube puzzles are excellent exercises to learn how to solve virtualized poly cube and poly ball puzzles. It is of course important to be able to save the progress while trying to solve a puzzle. Two local storage client-side data storage techniques have been included in the puzzles. Session Storage with the use of the document object model (DOM) has the advantage that it can be used while off line of the internet. It is limited, however, by the fact that the same browser must be used to store and to retrieve the session. A name can be given to the stored data so that various progress stages can be saved and retrieved. The buttons labeled Store, Load, Text and Erase as well as the text field labeled File have been introduced for this purpose. As an exercise load WEBGL_PC_3x3x3 then select S=Sol. in the scroller and move the curser over the canvas and whatch the solution jumping in. Now click the upper right cube and move the curser pulling out cluster 6, click again to drop the cluster and click Store. Now refresh the browser, or if present, click one of the separating lines ------ in the scroller, to load the initial presentation of non-assembled clusters and then click Load. Note that in this case no file name has been specified and the the session is stored under the "empty character" name. If you click Text you obtain an unparsed text string representing the state of the puzzle, in form of the object model matrix stack in JASON (JAva Script Object Notation). This text string can then be copied and pasted into a pure text editor such as the Microsoft NOTEPAD. With this we come to the second storage technique used which is less volatile and browser dependent than the described session storage in the DOM model. Save the unchanged NOTEPAD content under a chosen file name in your folder system of your computer of phone. Again refresh the browser to load the initial presentation of non-assembled clusters, and Browse... button following the sentence Import text file: and scroll in the before saved text file and move the cursor over the canvas to have your stored solution jump in.
Coming back to our discussion of the difference between solutions and positions for the 2x2x2 cube WEBGL_PC_2x2x2a_cl8 , one finds an analysis in the internet that shows that there are 240 solutions for the well known 3x3x3 Soma cube WEBGL_PC_3x3x3Soma of Piet Hein (http://puzzler.sourceforge.net/docs/polycubes.html and http://puzzler.sourceforge.net/solutions/cubes/soma-3x3x3.txt ). On the other hand one finds a note in http://mathworld.wolfram.com/SomaCube.html stating that there are 1'105'920 solutions according to symmetry considerations. In this latter case, it is clear, that solutions and positions are counted up. For the Soma cube two solutions have been programmed in and can be selected in the scroller, next to the button Block. The Soma cube is an excellent example to get familiarized with the user interface. In view of the existing 240 solutions existing, it is not a very difficult puzzle. Go through the list of the 3x3x3 poly cube puzzles to get acquainted with the various three dimensional and racemic clusters: WEBGL_PC_3x3x3, WEBGL_PC_3x3x3a_cl30_31_33_34, WEBGL_PC_3x3x3b_cl30_31_32_35, WEBGL_PC_3x3x3c_cl18_19_22_24, WEBGL_PC_3x3x3d_cl31_37_38_39, WEBGL_PC_3x3x3e_cl36_39_40_41, WEBGL_PC_3x3x3f_cl25_27_28_29_32, WEBGL_PC_3x3x3Soma. As a last poly cube case to be mentioned, I have assembled all racemic pieces in WEBGL_PC_4x4x4a_racemics. As an ultimate exercise you are welcome to try to find a solution for this puzzle (let me know about your success on brordorf@gmail.com ). Some clusters will surely need a change of coloring pattern if there is a solution existing for this case.
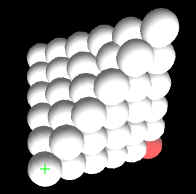
Rock-salt crystals: same cubic clusters used as for the poly cube cubes, but using balls instead of the cubes
The same puzzles as listed above are presented here in a cubic crystal lattice: WEBGL_PBC_2x2x2, WEBGL_PBC_2x2x2a, WEBGL_PBC_2x2x2b, WEBGL_PBC_3x3x3, WEBGL_PBC_4x4x4, WEBGL_PBC_5x5x5, WEBGL_PBC_6x6x6. The included solution of WEBGL_PBC_3x3x3, for instance, is the crystal structure of NaCl. The white balls alternate with the black balls and one type represents the sodium ions, the other the chlorine ions, respectively.
Cluster definitions and the order of rotations around Z-, then Y-, and lastly X-axsis
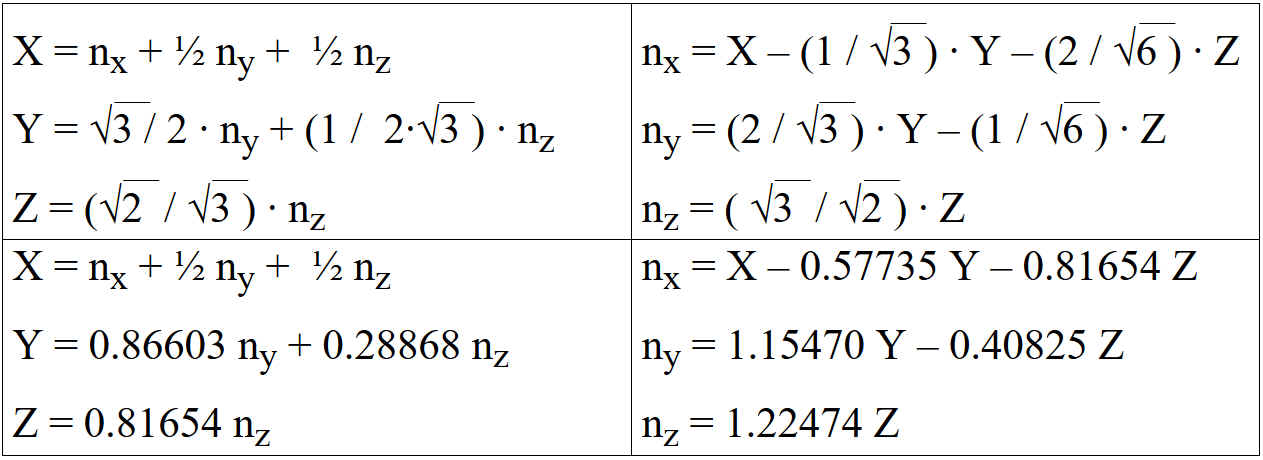
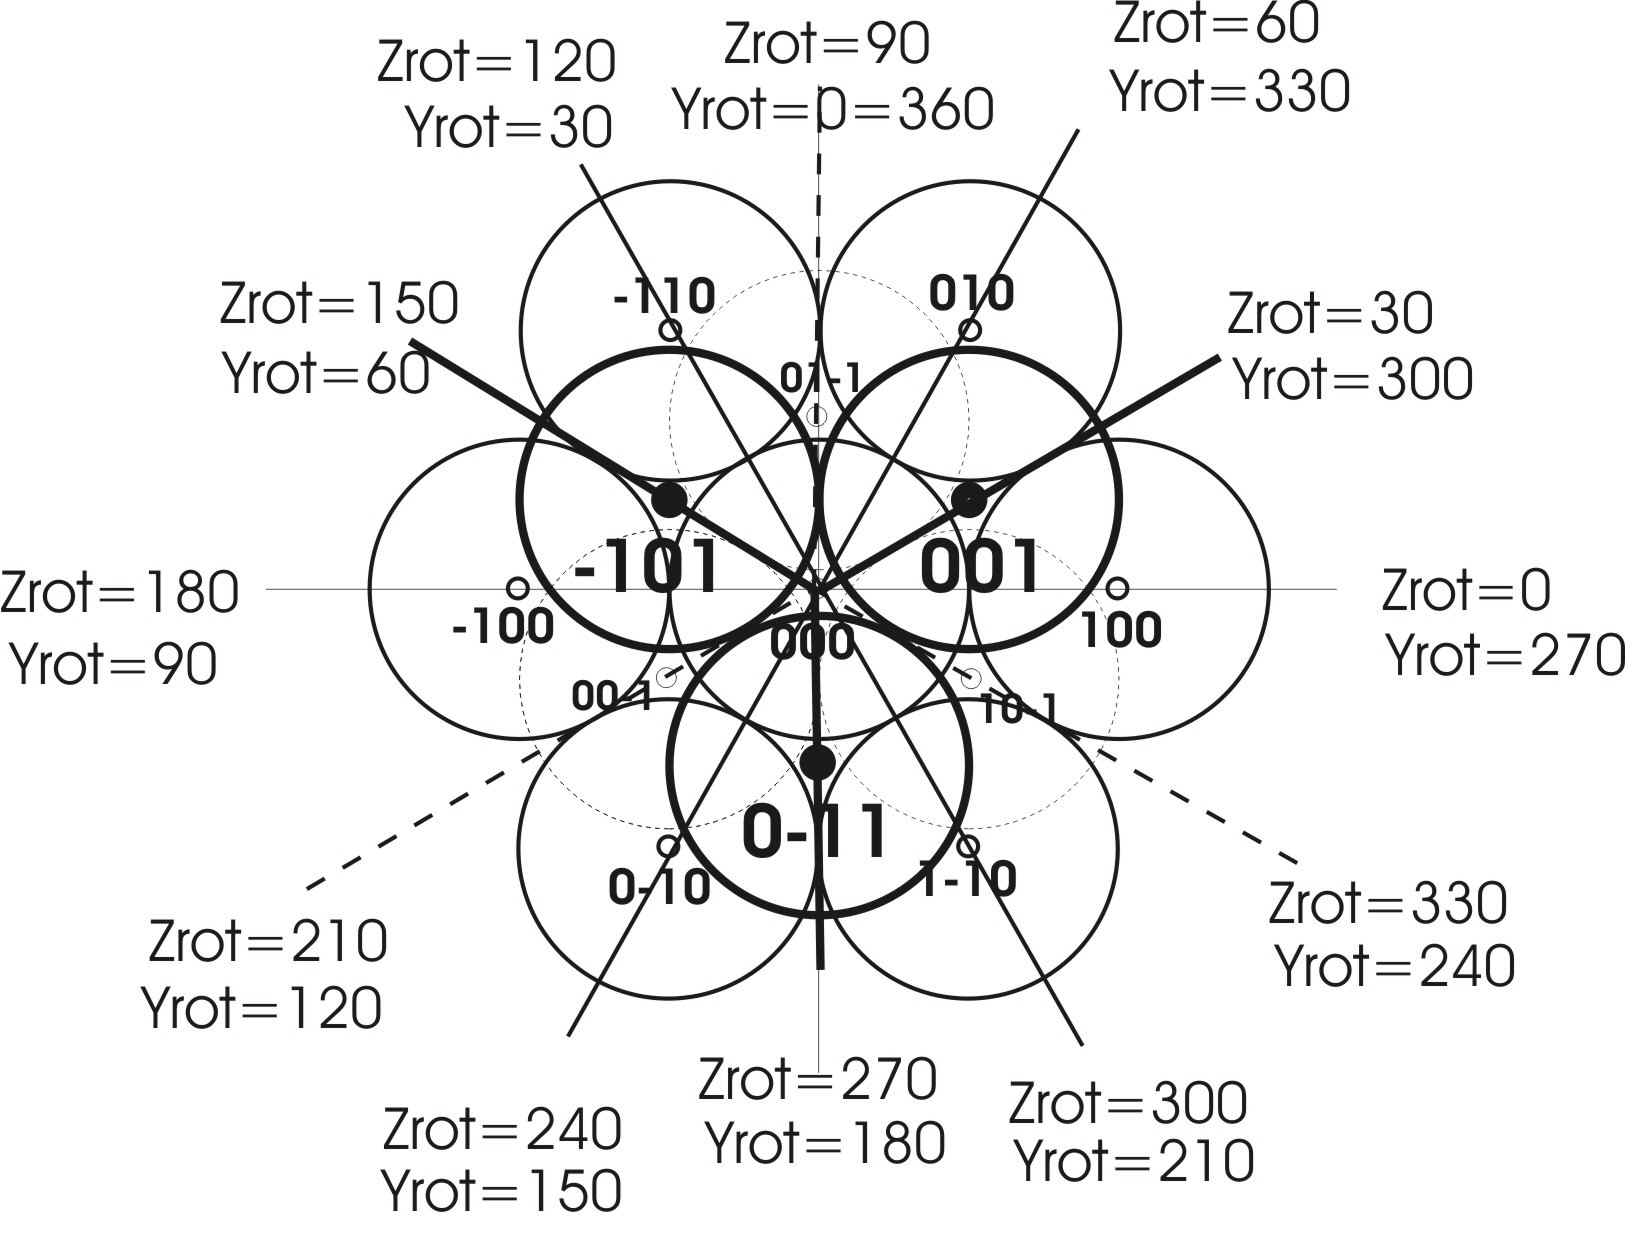
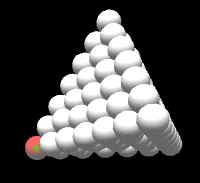
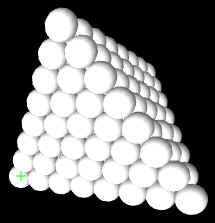
The geometrical framework is much more complex for poly ball puzzles as for poly cube ones. The present poly ball puzzles are built up in the cubic densest ball packing having layers in the sequence of abcabc... in a trigonal coordinate system. The angles between the x-, y- and z- axis are 60 degrees. In the following diagram the arrangement of the balls are illustrated showing the positions as a function of the coordinates x, y and z. Light solid lines show balls in the plane of z=0 (layer a), while bold lines indicate balls with Z =+1 (layer b) and dotted ones with z=-1 (layer c). With poly cubes all coordinates of placed clusters remain in an orthogonal system aligned to the computer monitor axis x, y and z and thus all coordinates remain integers and all angles are multiples of 90 degrees. Neither of these advantages remain with poly ball puzzles where all coordinates need constantly to be translated between the orthogonal and the trigonal axis in a vice versa manner. A closer analysis shows that the rotation angles of the clusters are very complex indeed. An additional complication stems from the fact that the clusters can have both trigonal (multiples of 30 degrees) and cubic angles (multiples of 90 degrees). The linear pieces, for instance, are members of both systems. Examples of cubic clusters are 6, 10, 14, 17, 15 and others. Examples with cubic and trigonal angles are for instance the racemic pairs 26 and 27, or 28 and 29. The following table gives the conversion factors from the orthogonal coordinates X, Y and Z to the trigonal ones nx, ny and nz, and from the trigonal to the orthogonal ones, respectively. Those interested in the JAVA Script programming can have a look at the function Align_keydown(ev, gl, n, viewProjMatrix, u_MvpMatrix, u_NormalMatrix) on lines 2260 to 2305, where these conversions are used, in the code of the puzzle WEBGL_PB_4x4x4, which you can see by right click outside of the canvas and View Page Source. They are furthermore used in the function trigCoordinatesParser() on lines 3658 to 3714 and one can see at this place that the poly ball tetrahedron puzzles have bee programmed with a pyramide in mind which stands on the xy monitor surface and grows in positive z direction towards the observer.
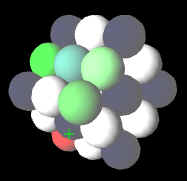
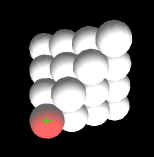
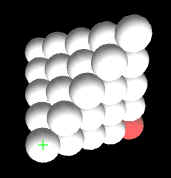
All poly ball clusters are defined with the first ball at 0,0,0 (x=0, y=0, z=0) and the second ball always at 1,0,0 (x=1, y=0, z=0). This system results in a privileged importance of the z- and y- coordinates of the second ball, which defines the orientation of the cluster in the trigonal coordinate system. Once placed in this way, the cluster can then be turned about the x-axis only, in order to place all of the balls of a given cluster in the cubic densest ball packing. We discovered, that by inverting the rotation sequence from Xrot, Yrot, Zrot to Zrot, Yrot, Xrot in the application of the rotation matrix to the object model matrix, we indeed arrive at a decoupling of the x-axis rotation from the status of the previously done rotations about the z-, and the y-axis. With other words, when not following this convention in the definition of the clusters, the rotations of x and y, and of x and z are coupled which means that the y and z angles are also changed when rotating around the x-axis. These considerations are important for the manner of how to solve a puzzle: one should keep in mind to first correctly place the initial two balls (colored bright green and bluish green) by turning first around z and then around y. Only after correctly placing the initial two balls correctly in the crystal lattice by clicking Align should one proceed to turn the cluster around the object x-axis in order to place and Align the rest of the cluster in the lattice and then klick Store.
The following figure shows a diagram of the cubic densest ball packing and lists all possible trigonal and cubic angles for turning clusters in the x-y surface. 60 degree angles are applied when placing the second ball in the z=1 or z=-1 surface. These angles are further modified when going into the third dimension by the tetrahedron angles between edges and adjacent surfaces (54.74 degrees) and between neighboring surfaces (70.53 degrees). The latter angles come into play when rotating the reminder of the cluster into the cubic densest crystal lattice by turning about the object axis x. Puzzle solutions for all clusters presented in 3x3x3, 4x4x4 and 5x5x5 poly ball pyramids, have been modified by a systematic change of the pyramid positions to test all resulting angles and the predominant angles are given in red in the table below the diagram. As the exact angles of rotations are essential to be able to build up the cubic densest ball packing, a mechanism has been programmed, which allows to snap approximate angles into the sharply defined correct angles by pressing the button Align. Only when the first two balls are correctly placed in the trigonal lattice, one changes over to turning around x - axis by clicking the z>x button, which then changes to x>z, now allowing to turn the cluster around the x-axis. When the angles are far from the allowed trigonal angles leading to coordinates which are not allowed in the cubic densest ball packing a warning alert appears, such as "1 Bad trigonal orientation dX=0.5 dY=0 dZ=1 of Clust._5" . The trials are counted from 1 to 3, and after the third bad trial the y- and z- rotations are reset to 0 degrees. Note, the dX = 0.5 indicates a placement of the second ball between two of the possible layers had been attempted!
| Possible Angles Trigonal | 30 | 60 | 90 | 120 | 150 | 180 | ||
| Possible Angles Cubic | 90 | 180 | ||||||
| All Possible Angles | 30 | 60 | 90 | 120 | 150 | 180 | ||
| Angle edge-surface = | 54.74 | plus | 84.74 | 114.7 | 144.7 | 174.7 | 204.7 | 234.7 |
| 360 | minus | 335.3 | 5.26 | 35.26 | 65.26 | 95.26 | 125.3 | |
| Angle surface-surface = | 70.53 | plus | 100.5 | 130.5 | 160.5 | 190.5 | 220.5 | 250.5 |
| neg + | 360 | minus | 319.5 | 349.5 | 19.47 | 49.47 | 79.47 | 109.5 |
| All Possible Angles | 210 | 240 | 270 | 300 | 330 | 360 | ||
| Angle edge-surface = | 54.74 | plus | 264.7 | 294.7 | 324.7 | 354.7 | 384.7 | 54.74 |
| minus | 155.3 | 185.3 | 215.3 | 245.3 | 275.3 | 305.3 | ||
| Angle surface-surface = | 70.53 | plus | 280.5 | 310.5 | 340.5 | 370.5 | 400.5 | 430.5 |
| minus | 139.5 | 169.5 | 199.5 | 229.5 | 259.5 | 289.5 |
Exercises on poly ball assemblies and getting acquainted with the cubic densest ball packing.
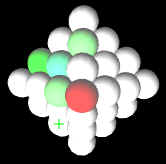
Please open first the simplest of all poly ball puzzles WEBGL_PB_2x2x2 and try to build tetraedric two edged ball pyramide by transferring the second dimer cluster from the right to left. Shift the light green ball above the red and white balls of the first dimer in order to form a triangle formed by the red, the white and bright green ball and then click the Align button. Now click the Rot (Rotate) button and with the mouse place the blue green ball above the red-white-bright green triangle (meaning in your direction when looking at the monitor). Click Align again and note that if the bright green ball has been placed above (in positive z-axis direction of the monitor) the blue green ball jumps into the correct position forming a pyramid. If, however the bright blue ball was placed below the red-green dimer you will get the following error message upon clicking Align; "1 Bad trigonal orientation dX=-1 dY=1 dZ=1 of Clust._48". This indicates, that in this case, the direction between the bright green ball and the blue green ball is not compatible with the cubic densest ball packing as positioned here. Have a look at the above diagram in order to understand this fact. The trigonal x-axis is congruent with the orthogonal x-axis, the horizontal line on your monitor pointing from left to right from the ball 0,0,0 to the ball 1,0,0. Secondly the trigonal y-axis is not congruent with the vertical y axis of your monitor. It is in the plane of the monitor, but at an angle of 60 degrees to the x-axis and points from the ball 000 to 010. The bottom face of the pyramid must thus be congruent to the three balls 0,0,0 , 1,0,0 and 0,1,0. Thirdly the trigonal z-axis points towards you the viewer at angles of 60 degrees each between the x- and the z- axis and between the y- and the z-axis, or at an angle of 54.74 degrees between the trigonal z-achsis and the monitor plane or the bottom surface of the pyramide. The correct direction between the bright green and the blue green ball, points thus from 0,1,0 to 0,0,1 , which after parallel shift is the same as 0,0,0 to 0,-1,1. Note this complication is a consequence of the abcabc... sequence of the layers in the cubic densest ball packing. To summarize the ball pyramid must always be placed above the x-axis with the trigonal x-axis kongruent to the x-achsis of the monitor. The 2x2x2 pyramid could of course also have been built by rather having the first cluster with the red ball point in z-direction from 000 to 001 (and each dimer can of course also point in the reversed direction). A thorough analysis of all possible trigonal positions is contained in the WEBGL_PB_3x3x3TrigonalAngleAnalysis .
The exercise puzzle WEBGL_PB_3x3x3 builds a ball pyramid from the three non cyclic trimers and is a demonstrator of how to place trigonal (cluster_5 = PB_3F_120) versus cubic clusters (cluster_6 = PB_3F_90). Here a short description of how to build up the solution programmed in. First move the red ball to the left and then pull up the linear trimer (cluster_3) placing the bright green ball on the green cross 0,0,0 and click Align. Next move the right angled trimer, cluster_6, to place its bright green first ball above the first (bright green) and second ball (blue green when selected) of cluster 3, then Align. Click the Rot (or Rotate) button, then click the z>x button, as the first two balls are already correctly placed in the densest ball packing. Now turn cluster_6 around the x-axis by moving the cursor in a straight line up exactly parallel to the y-axis of the monitor, thus in the positive sense of the right handed coordinate system. This in order to place the moving third ball, in a rotating movement around the x-axis, above ball 2 and 3 of the cluster_3 and then click Align to precisely place the ball over the two balls mentioned. Next click the Trs (or Translate) button in order to translate cluster_5 in order to place its bright green first ball above the first and second ball of cluster_6 (note as the translate mode button shows x>z). The cluster remains in the ground layer of the growing pyramid. Note: the first balls of the cluster_3, cluster_6 and cluster_5 should be in a straight line after clicking Align, in the positive direction of the trigonal y axis, thus having the trigonal coordinates 0,0,0 , 0,1,0 and 0,2,0 (x=0, y=2, z=0).
As a next thing we must place the second blue green ball of cluster_5 in the trigonal coordinate position 0,1,1, that means over its own first ball and the first and second ball of cluster_6. For this we click Rot or Rotate and leave z>x and Z->X in the z-position, in order to rotate about Zrot and Yrot only. This can be done by moving the mouse and then clicking the cluster, or by clicking the cluster once to have the status line in red below on the canvas saying Rotate active cluster_5 . This liberates the cursor from the cluster allowing now to click the z slider and then either slide the slider using the mouse or better move the slider using the right and left cursor keys on the keyboard. Move the blue green second ball to exactly above (under) the bright green ball (in positive sense of the monitor y-axis). This corresponds to a plus 90 (or 270) degree turn of the cluster_5 around the orthogonal z-axis of the cluster, the model based orthogonal coordinate system. After this click on the y-slider and move the slider all the way to the right side and then push the left cursor key until the rotating second ball is placed above the first ball of cluster_6, and the first and second ball of cluster_3. Then click Align. Clicking the x slider allows to rotate the cluster around its x-axis using the cursor keys. Or, alternatively, after clicking the z>x or Z->X button one can also turn the cluster around its x-axis using the mouse. Click Align and then repeatedly click +45 in order to turn the World View around the y-axis of the monitor in order to inspect the puzzle from all sides. We finally have to move the single red ball to the top of the growing pyramid. For this click Trs or Translate button to switch back from the blue rotation mode canvas to the black translation mode canvas. When moving the ball through the pyramid it disapears below the already stacked up clusters as it moves on the lowest layer or the trigonal z=0 layer. In order to move it up the x>z or X->Z button can be clicked. One could alternatively turn the world view by 90 or 270 degrees and then move the ball up by turning around the y achsis. In a third and best approach one could select the single ball and then type the trigonal coordinates 0,0,2 into the text field and enter these coordinates by pressing Align. Note that we have included a second solution into the scroller of the puzzle WEBGL_PB_3x3x3 and that the ball 1,0,1 is slightly moved by switching between the two solutions, a problem related to rounding errors involving the right angled cluster_6 = PB_3F_90.
The WEBGL_PB_3x3x3a_cl7_cl10.html is an non complete pyramid assembly as a demonstration of a possible placement of the right angled clusters in the cubic densest ball packing. WEBGL_PB_3x3x3b_cl26_cl27 and WEBGL_PB_3x3x3c_cl30_cl31 are interesting in this context as both of these assemblies contain each a racemic pair with mixed angles, meaning 90 degrees (cubic) and 60 or 120 degree (trigonal) angles. As an exercise load one of these assemblies, chose the solution in the scroller and move the mouse over the canvas. Then click Align and type MAP into the text field. Take a screen shot of the mapping (http:hyperionics.com) and try to build up the solution after having clicked the "-----" in the scroller.
All of the remaining 4x4x4 and the 5x5x5 poly ball puzzles listed above, have been used to determine the exact z-, y-, and x- axis rotation angles about the orthogonal model coordinate system of all clusters. Have a look at the scroller of one of these 4x4x4_PB puzzles and you will notice that there are of course fewer possible positions for a chosen solution for a poly ball tetrahedron than for a poly cube as studied above. This permits a simpler nomenclature with S for the solution as originally built up, and R, L and F for flipping the pyramid to the right side, to the left side and to the front. Each of these positions can then be turned by 60 degrees either clock wise (S60cw, R60cw, L60cw, F60cw) or counter clock wise (S60ccw, R60ccw, L60cw, F60ccw). Note that the "external" positioning of the pyramidal solution, thus of the tetrahedron, is considered here only, and not "internal" positional differences due to various possibilities of the placement of symmetric clusters in a given solution (ie clusters 4, 14, 18 and many others). You can download the angle analysis if you are interested in the details of the analysis and study the many stored configurations contained in WEBGL_PB_3x3x3TrigonalAngleAnalysis:
Download WEBGL_PB_AnglesAnalysis in EXCEL for Windows: WEBGL_PB_AnglesAnalysis.xls
The simple 3x3x3 tetrahedron used in the angle analysis has been designed to contain a single ball, a liner trimer cluster, and the two simplest non-linear trimer clusters. The latter having a trigonal angle of 120 degrees, or the the orthogonal angle of 90 degrees, respectively. The monomer has the advantage that it is correctly placeable by the coordinates x,y and z and is thus independent of any angle of rotation. The linear cluster is indifferent to rotations about the x-axis. Compared to the dimer, the trimer permits to find y- and z-axis rotation angles with twice the precision. The trigonal cluster can be placed in one of the a trigonal planes parallel to one of the
tetrahedron surfaces, having a 6-fold symmetry of in plane rotation. The orthogonal cluster, on the other hand, finds its place in one of the cubic planes, which are parallel to two non intersecting edges of the
tetrahedron. These planes have a four fold symmetry of in plane rotation. Two additional single balls have been introduced as markers for finding the correct, angle dependent positions, of the extreme ball of the trimers when rotating the tetraedre of a given solution. This is a scheme for finding possible rotation angles of the clusters as a function of their trigonal orientations in an experimental way. We have use this approach, in order to get real angles in the object model matrix stack and not imaginary angles, as they result by switching over to quaternions. Note, all the results of this study are contained in the program line covered in the function Angle_combinations(i, il, Xrot, Yrot, Zrot, Xrot_ini, Yrot_ini, Zrot_ini, Rx, Ry, Rz).
This function has been introduced into the code for turning cluster assemblies, denominated blocks. The name covered by the number 1 is reserved for the block formed by all clusters contained in the chosen html-page loaded, as generated when typing the keyword LOCK into the File text field. The
Help also indicates, how individual chosen clusters can be re-detached from block 1 by using the
Lock button.
The LOCK mechanism which allows to lock all clusters of a finished solution into the common block 1 can be used to rotate the solution into new
tetrahedron positions. This are complex transformations, due to the interplay of the orthogonal coordinate systems of computer monitor, the world and the clusters with the trigonal system of the
tetrahedron pyramids. Turning around the z-axis is
straight forward with 120 degree turns bringing new regular tetrahedron positions which can be Aligned. Changing the bottom surface of a
tetrahedron can be done either by flipping by 109 degrees around the x axis followed by a z-axis turn. It can also be done by aligning an edge of the
tetrahedron with the y-axis and then flipping by 109 or 251 degrees around the y-axis. In the latter case, a
sequence of z-axis, y-axis and again z-axis turns must be done. The intermediate states should be stored and re-loaded, however, they can not be Aligned as they are not regular positions of the
tetrahedron. Unlock assemblies before storing them. Move locked solutions to integral lattice positions before clicking Align by centering the bottom left ball on 0,0,0 indicated by the green cross on the canvas. Else seemingly well aligned clusters can jump out of allignement, when clicking Align, which is a sign that the
tetrahedron was positioned halve ways between two correct positions.
Here the step by step procedure for flipping the tetrahedron solution around the x-axis: Align the chosen solution, type LOCK into text field, select any cluster, click Block, click the X slider and move with right cursor key to 109 as indicated in text field. Click Block, click Canvas 3 times to deselect cluster, Erase, Store. Select any cluster (do not click Align), Block, the Zr-slider and then move Zr to 60 and finally click Block and then Align. Secondly, an example of flipping around the y-axis: load for instance the solution S5 in the scroller, type LOCK, change to Rot, click Align, select a cluster, click Block to move, set the z-rotation by the Z slider to 330, click Block, Erase and Store. Refresh the browser, click Load, type LOCK, change to Rot, select a cluster (do not click Align as we are not in a valid trigonal position), move Yrot slider to 109 degrees and click Block, Erase, Store. Refresh the browser, click Load, type LOCK, change to Rot, select a cluster (do not click Align as we are not in a valid trigonal position), move Zrot slider to 30 degrees and click Block, Align (we are now in a valid trigonal position), Erase, Store and Text. The text can then be copied to the Notepad to store the new trigonal position of the solution. Finaly
click Align and type MAP into the text field then click the canvas (without
hitting the Enter key!). Note, sometimes the browser needs to be shut down and
reopened entirely and not just refreshed to clean out all arrays.
As a summary the generalized procedure for turning a solution into a new position:
Type LOCK into the text field, click Align, change to rotation mode, select any cluster by once clicking it, click BLOCK, click the wanted slider and move it by clicking / holding the wanted cursor key on the keyboard (< or >)
and to finish off click Block. Please note, that scrollers are not reset upon reloading a page and must thus be moved out and back into the old position again to reload a solution. Note, sometimes the browser needs to be shut down and reopened entirely and not just refreshed to clean out all arrays. As a note on slider movements, always deselect any cluster by clicking the canvas up to three times, before selecting a programmed solution in the scroler, or performing any special operation , such as UNLOCK.
Lets first have a look at the simpler flat clusters and WEBGL_PB_4x4x4a is a special case at it is built up from five times the same non symmetric P - shaped tetramer cluster (cluster_8, _34, _35, _36, _37). The assemblies WEBGL_PB_4x4x4b and WEBGL_PB_4x4x4c where important for the angle analysis, as they contain the linear tertramer cluster_7, which is of course invariant to rotations around the model object axis x. They permit to learn how to correctly position a cluster in the cubic densest ball packing by z- and y-rotations. As an exercise load the solution R in the scroller of WEBGL_PB_4x4x4b and print out the mapping by clicking Align and then type MAP into the text field. Copy this out on a piece of paper and draw the versions turned by 60 degrees cw or ccw. Click ---- to re-initialize the puzzle and then try to rebuild S60cw and S60ccw. Now try to modify the R to R60cw or R60ccw by moving (translation) and rotating (z, y, and x rotations) each cluster into the new position. Keep in mind to click Align and the Erase, Store after each step of progress. Personnaly I often store the progress on a text file by clicking Text copy/pasting this text to the Notepad in the file system. This can then be reloaded by clicking Browse and fetching and opening the stored file again. Remember that the first, bright green ball can be placed (translated and rotated) by entering the trigonal coordinates (of the first ball) and rotations (of the cluster) x,y,z,xrot,yrot,zrot into the text field and clicking the ENTER key on your keyboard. For instance 0,0,3 for the linear tetramer cluster_7 as placed in the discussed cases R, R60cw or R60ccw, or 0,0,3,0,54.74,270 for cluster_7 as placed in R of WEBGL_PB_4x4x4b.
The next two assemblies, WEBGL_PB_4x4x4d_cl1_4_8_9_12_16 and WEBGL_PB_4x4x4e_cl2_4_5_12_13_16 , introduce the cluster_12 which is easy to place and cluster_16 and cluster_13 which more are difficult to place in the crystal latice. The flat clusters_15 and _17, which have orthogonal angles are contained in the assembly of WEBGL_PB_4x4x4l_cl15_cl17. Remaining flat clusters are assembled in WEBGL_PB_5x5x5a_cl1_3_6_7_9_10_14_15_17. The thee dimensional racemic pairs are introduced with WEBGL_PB_4x4x4f_cl22_cl23, and WEBGL_PB_4x4x4g_cl24_cl25, which have trigonal angles, and with WEBGL_PB_4x4x4h_cl28_cl29 , WEBGL_PB_4x4x4i_cl26_cl27 and WEBGL_PB_4x4x4k_cl30_cl31, which have trigonal and orthogonal angles. The three dimensional clusters having an internal mirror plane, clusters_18, _19, _20, _21 do not form racemic pairs and the last three of them form part of WEBGL_PB_4x4x4. The cluster_18 is itself already a tetraedric 2x2x2 pyramid and is easy to place. A comprehensive file has been assembled which covers all of the clusters of poly ball assemblies up to tetramers and a collection of the solutions from 4 to 7 ball edged tetrahedrons: WEBGL_PBT_4to7.
As a great exercise to end with, try to build up the published solutions of the 5 layered to 8 layered ball tetrahedron pyramids ( WEBGL_PB_5x5x5, WEBGL_PB_6x6x6, WEBGL_PB_7x7x7 and WEBGL_PB_8x8x8 ). Please note that there is a mistake in the published solution of the 7x7x7 pyramide: the 004 ball is of cluster 13 and the 024 ball is of cluster 25, rather than of 25 and 13, respectively, as published.
Step by step instruction for building up the tetraedric 8x8x8 PolyBall pyramide.
The following indicates in a step by step description how one can build up the WEBGL_PB_8x8x8 ball pyramide: First move away the two monomer clusters 1 and 32 and place the bright green ball of 13 on the green cross of 0,0,0 (trigonal coordinate of the initial ball of cluster 13) and click Align. Move away cluster 4 and click 13 again and the Rotate (Rot). Click the Z slider and rotate by about + 30 degrees around the z axis by holding down the right cursor key. Now click the Y slider, move the slider to its maximum 360 degrees and dress up the cluster by reducing the angle by holding down the left cursor key. This until the second ball comes to lye on the raising trigonal z-achsis. I then click Align, and then the X slider , move the slider to 360 and hold down the left cursor key, to rotate the cluster by about 30 degrees in counter clock sense, then click Align. I click Translate (Trs), before saving remove any text in the text field and then click Store. Move cluster 4 with its first ball to 1,0,0 by entering 1,0,0 into the File text field and Align. Then click Rotate (Rot) and turn the cluster using the Z slider by about +30 degrees, then click Align and then Translate. Erase any text remaining in the in text field and then click Store (I always store my progress under the name of no text). Please click Help and scroll down in order to see all of the clusters in the scalable vector graphics presentation of the GLOSSARY Cluster_number <-> Cluster_names.
Next you can move cluster 2 to the left and replace it by cluster 16. Turn cluster 16 by + 30 degrees around the Zrot axis using the Z slider and the right cursor key, click Align, Translate, Erase and Store. Move out of way cluster 3 and activate 23 by two clicks and then enter the trigonal coordinate 4,1,0 into the text field called File and press Align. Then rotate the active cluster_23 by 360 - 120 or +240 degrees around the Z axis using the slider and cursor key, then Align, Translate, clear the text field and Store. I move away 7, activate 8 and enter the trigonal coordinates 5,2,0 and click Align, then Rotate (Rot) around Z by 360 - 60 = 300 degrees, and around Xrot by 180 degrees, Align, Translate, Erase and Store, after having erased the 5,2,0 in the File field, as else you store the game under the name of 5,2,0 (I will henceforth no longer mention these routine clicks). Note that you can check the established angles by clicking Text where you will find the following sequence: [8,8,"4F_180_60",0.969,0,18,5.19618,0,180,0,300, .... Xorth=18, Yorth=5.19618, Zorth=0, Xrot=180, Yrot=0, Zrot=300 (note, Xorth, Yorth, Zorth are the orthogonal and not the trigonal coordinates of the initial ball, in this case with Xorth= 6 x 3 = 18 as each ball has a diameter of 3 units - see above for the table of conversion factors). With komplex puzzles as the WEBGL_PB_8x8x8 ball pyramide it is advisable to permanently store the progess from time to time: after Store, click Text to obtain the progress as a textstring in JASON (JAva Script Object Notation). This text string can then be copied and pasted into a pure text editor such as the Microsoft NOTEPAD. Save the NOTEPAD content under a chosen file name in your folder system of your computer of phone. In order to reload the progress click the Browse... button following the sentence Import text file: and scroll in the before saved text file and move the cursor over the canvas to have your stored state of the solution jump back in.
Cluster 6 goes to 4,2,0 and is rotated by 300°s around the Zrot and by 54.74° around Xrot (the cubic cluster lies parallel to the edge in the tetrahedron and has an angle of 54.74° with respect to the surface of the base). Activate cluster 20 and move it to 4,1,1 by entering this number into the File text field. Rotate by Zrot = 300° and then Xrot = 180°. Move 31 to 4,3,0, then set Zrot to around 120°s and Align. Move 22 to 130 and turn the cluster into position by Zrot equal 300° = 360° - 60°. Move cluster 24 to 0,2,0 and rotate about Zrot by aproximately 60° and then by roughly 110° around Xrot (109.47°). Cluster 29 goes to trigonal coordinates 2,3,0, and is rotated about Zrot by 120°. 27 goes to 040 and Zrot = 60°. Only 15, 30 and 9 are still missing in the base surface (Z = 0). Balls 1 and 2 of cluster 30 stay on the ground surface. Ball 1 is positioned on the trigonal coordinates 240, Zrot = 60 and Xrot = 109.4 degrees. Cluster 30 is indeed a most challenging cluster to be placed and you may have to play around a bit to discover all of the possible bad placements of the cluster in its positioning in the 8x8x8 poly ball pyramid. 15 goes to 020 and must be built in with the first two balls in direction of the left rising edge of the pyramid as it is a cubic cluster, and thus with with Zrot = 180 and Yrot = 360 - 54.74 = 305.26 degrees. 15 is finally spun around the Xrot axis by 30 degrees (note the "horizontal" placement of 15_4 right of 13_4 in the 3rd layer of the pyramid). 9 goes to 070 and is rotated to Zrot = 90 and Yrot = 180 + 54.74 = 234.74. The cluster is adjusted into the crystal lattice by turning around Xrot to 90 degrees. Please note that all of these angles are found by correctly placing a cluster in the crystal lattice and do not need to be typed in. The Align mechanism does the rest to convert the approximate angles found into precise ones. The latter is important when building up a complex ball pyramid, as errors would propagate across the complete puzzle.
The bottom layer being finished (repeatedly click +45 to see the bottom layer from below) we can now complete the second layer. Cluster 2 goes to 101 and Zrot = 30 and Yrot = 305.26. The also linear cluster 7 goes to 0,0,2 and Zrot = 30 and Yrot = 305.26. Cluster 19 goes to 6,0,1 with Zrot = 150°, Yrot = 305.26° and Xrot = 240°. Cluster_17 has its first ball on 3,0,1 with Zrot = 120° and Xrot = 125.26°. Cluster 10 is placed on 2,3,1 with Zrot = 300° and Xrot = 54.74°. Cluster 21 goes to 0,4,2 (and not to 1,2,2 !), Zrot = 250° and Xrot = 250.53°. Cluster 25 starts from 1,3,2 with Zrot = 300° and Xrot = 180°. Cluster 28 goes to 1,2,3 with Zrot = 300° and Xrot = 174.74. Cluster 11 is placed on 2,0,2 and must be spun to Zrot = 150° Yrot = 305.26° and Xrtot = 240° (which is a little difficult as badly visible). 14 goes to 3,0,3 with Zrot = 60° and Xrot = 54.74°. Cluster_18 goes to 1,1,3, with Zrot = 270°, Yrot = 305.26° and Xrot = 54.74°, meaning it is placed here top down in the pyramide! The monomer 1 goes to 0,2,3. Cluster 5 goes to 2,3,2 with Zrot = 150°, Yrot = 305.26° and Xrot = 234.74°. Cluster 26 goes to 2,2,3 (and not 0,3,3) with Zrot = 330°, Yrot = 234.74° and Xrot = 54.74°. 1' goes to 0,2,4. 3 goes to 4,0,3 Zrot = 150° and Yrot = 305.26°. The rhombic cluster_12 goes to 0,1,5 with Zrot = 60°. The second tetrahedron 18', finally, goes to 0,0,6 which finishes the 8x8x8 poly ball pyramide.
POLY BALL OCTAEDER (PBO)
Introduction to, and definition of poly ball octaeders, an additional habitus of the cubic densest ball packing .
Poly ball octaeders are a further possible crystallographic habitus (observable crystal manifestation), next to the tetrahedron or triangular ball pyramide, of the cubic closest packing. Puzzzles of this form have not been discussed in the above mentioned PUBLICATION and are thus given here.
- The 2 ball per edge 6-unit poly ball octaeder can be built from the monomer, the dimer and the trimer piece which has a three fold symmetry achsis.
- The 3 ball per edge 19-unit poly ball octaeder can be built from all pieces to trimers in addition to the 2-ball edge tetrahedron .
- The 4 ball per edge 44-unit poly ball octaeder can be built from all flat tetramer pieces.
- The 5 ball per edge 85-unit poly ball octaeder can be built from the same clusters as used in the 7 layer 84-unit ball pyramid plus a single ball. Namely from all flat 3- to 4-ball pieces which have at least one two fold symmetry axis, in addition to all raceme pieces plus a single ball.
- The 6 ball per edge 146-unit poly ball octaeder
can be built from all pieces to tetramers (115 units) in addition to the
non-flat tetramers which have at least one plane of mirror symmetry (16 units)
plus all clusters to the trimers (15 units).
The crystal structure is of course still the cubic densest ball packing but the possible rotation angles have changed as the crystall structure is turned with reaspect to the computer screen coordinates, when compared to the tetrahedron (trigonal poly ball pyramide).
| Possible Angles Trigonal | 30 | 60 | 90 | 120 | 150 | 180 | ||
| Possible Angles Cubic | 90 | 180 | ||||||
| All Possible Angles | 30 | 60 | 90 | 120 | 150 | 180 | ||
| Angle edge-surface = | 45 | plus | 75 | 105 | 135 | 165 | 195 | 225 |
| 360 | minus | 345 | 15 | 45 | 75 | 105 | 135 | |
| Angle surface-surface = | 54.74 | plus | 84.74 | 114.74 | 144.74 | 174.74 | 204.74 | 234.74 |
| neg + | 360 | minus | 335.26 | 5.26 | 35.26 | 65.26 | 95.26 | 125.26 |
| All Possible Angles | 210 | 240 | 270 | 300 | 330 |
0=360 |
||
| Angle edge-surface = | 45 | plus | 255 | 285 | 315 | 345 | 15 | 45 |
| minus | 165 | 195 | 225 | 255 | 285 | 315 | ||
| Angle surface-surface = | 54.74 | plus | 264.74 | 294.74 | 324.74 | 354.74 | 24.74 | 54.74 |
| minus | 155.26 | 185.26 | 215.26 | 245.26 | 275.26 | 305.26 |
| delta-ZY | Yrot | Zrot | Xrot | Xrot | Xrot | Xrot | Xrot | Xrot | Xrot | Xrot | Xrot | Xrot | Xrot | Xrot | Xrot | Xrot | Xrot | Xrot | Xrot | |
| 001 | 315 | 45 | 0 | 35.26 | 45 | 90 | 144.74 | 215.26 | 270 | 324.74 | ||||||||||
| 001 | 225 | 225 | 90 | 144.74 | 215.26 | |||||||||||||||
| 00-1 | 135 | 45 | 35.26 | 144.74 | ||||||||||||||||
| 00-1 | 45 | 135 | 215.26 | |||||||||||||||||
| 00-1 | 45 | 225 | 0 | 35.26 | 45 | 90 | 144.74 | 215.26 | 270 | 324.74 | ||||||||||
| 010 | 0 | 90 | 0 | 45 | 54.74 | 125.26 | 180 | 234.74 | 305.26 | |||||||||||
| 010 | 180 | 270 | 0 | 180 | ||||||||||||||||
| 0-10 | 180 | 90 | 0 | |||||||||||||||||
| 0-10 | 0 | 270 | 0 | 45 | 54.74 | 125.26 | 180 | 234.74 | 305.26 | |||||||||||
| 01-1 | 45 | 135 | 0 | 35.26 | 45 | 90 | 144.74 | 215.26 | 270 | 330 | ||||||||||
| 01-1 | 135 | 315 | 0 | 35.26 | ||||||||||||||||
| 0-11 | 225 | 135 | 0 | 144.74 | 150 | 270 | ||||||||||||||
| 0-11 | 315 | 315 | 0 | 35.26 | 45 | 90 | 144.74 | 150 | 215.26 | 270 | 330 | |||||||||
| 100 | 0 | 0 | 0 | 45 | 54.74 | 120 | 125.26 | 180 | 234.74 | 305.26 | ||||||||||
| 100 | 180 | 180 | 125.26 | 180 | ||||||||||||||||
| -100 | 0 | 180 | 0 | 45 | 54.74 | 125.26 | 180 | 234.74 | 240 | 305.26 | ||||||||||
| -100 | 180 | 0 | 234.74 | |||||||||||||||||
| 1-10 | 0 | 300 | missing | |||||||||||||||||
| 1-10 | 180 | 120 | missing | |||||||||||||||||
| -110 | 0 | 120 | missing | |||||||||||||||||
| -110 | 180 | 300 | missing | |||||||||||||||||
| 10-1 | 45 | 315 | 0 | 35.26 | 45 | 90 | 144.74 | 215.26 | 270 | 324.74 | ||||||||||
| 10-1 | 135 | 135 | 0 | 35.26 | ||||||||||||||||
| 11-1 | 45 | 45 | 0 | 35.26 | 45 | 90 | 144.74 | 215.26 | 270 | 305.26 | 324.74 | |||||||||
| 11-1 | 135 | 225 | 0 | |||||||||||||||||
| -1-11 | 315 | 225 | 0 | 35.26 | 45 | 90 | 144.74 | 215.26 | 270 | 305.26 | 330 | |||||||||
| -1-11 | 225 | 45 | 0 | 35.26 | 144.74 | 215.26 | 330 | |||||||||||||
| -101 | 315 | 135 | 0 | 35.26 | 45 | 90 | 215.26 | 270 | 324.74 | |||||||||||
| -101 | 225 | 315 | 0 | 35.26 | 215.26 | 270 |
Most of the octaeder puzzles which can be defined are most challenging for finding solutions. Indeed only one single solution has been found for the four ball edged poly ball octaeder when the unchanged set of the 11 flat tetramer clusters are used. My 5 weeks long search for a solution (see first of following links) can be followed by studying the 77 solutions presented in the block name scroll field of the following 4x4x4_PBO files: WEBGL_PBO_4x4x4_11x4F, WEBGL_PBO_4x4x4_11x4Fplus6x4R_26to31 , WEBGL_PBO_4x4x4_11x4Fplus1to4Fs , WEBGL_PBO_4x4x4_11x4Fplus4x4Tplus4x4R_22to25 . All of these 77 solutions have been obtained only by exchanging at least one of the eleven flat tetramers by other clusters. This study has been undertaken in order determine all of the valid Xrot, Yrot and Zrot rotation angles in the flipped over model space coordinate system of the octahedron as compared to the tetrahedron in ball pyramid positioning as discussed above. In order to save development time, this has for the moment been done in a less systematic way as in case of the tetrahedrons. The results, as shown in the table above, have been included into the Align mechanism, which is contained in the function drawBox(gl, n, viewProjMatrix, u_MvpMatrix, u_NormalMatrix) on 2950 to 3676 in WEBGL_PBO_4x4x4_11x4F.
I personally found these octaeder puzzles to be an excellent way to further strengthen my mental competence of imagining three dimensional objects and their interactions. For example imagine how the the two layer tetrahedron, cluster number 18, can be placed in the octaeder. For saving time, I also use a physical set of all of the clusters built up from 15mm wooden balls glued together. This is done for the 11 flat pieces in about one hours work. This permits to very rapidly try out different constellations and more rapidly spot difficult to find solutions. For constructing octaeder puzzles using wooden clusters, you will need to construct an inverted Egyptian pyramid from 4 equal sided triangles, forming a funnel like construct. In order to be able to solve these puzzles you will need to learn how each of the clustres fit into the crystal structure. You will then to develop a strategy to succeed finding solutions. For this you will need to learn which clusters are easy to place in all situations. As a strategy, keep the small units to the end in order to fill the gaps. Indeed, all assemblies which miss the smaller polymers, such as the 4x4x4 poly ball octaeder built up from the eleven flat tetramers, are extremely difficult for finding a solution. This is the reason why combined assemblies have been prepared, allowing switches of clusters to finish up a promising solution. You will note that 77 of such "cluster - switching" solutions are contained in the scroller of the 4x4x4 poly ball octaeder. These solutions are indeed a trace of my 6 weeks lasting search for the final solution of this challenging puzzle contained in the scroller. The first of the above files, WEBGL_PBO_4x4x4_11x4F, again shows the difference of the one and only single physical solution found for the 4 edged octaeder according to the definition given above, and 23 additional "computer solutions" studied by turning (_90, _180, _270), flipping (S2, S3) and mirroring (m) the physical solution.
When you open any of the above files you will always see two sets of clusters: a) the eleven flat tetramers positioned on the level of z=0 (on the computer screen) and b) a second set of exchange clusters which are positioned behind the monitor and they are thus smaller. In order to use one of these latter clusters, it must been pulled forwards from negative z to more positive z values. This happens in translation mode on the black canvas after clicking the x>z button so that it shows z>x. Click on the cluster to have it in green and pull the mouse to the right and above (in positive x and positive y direction in the computer monitor coordinate system. These extra clusters are placed on negative z values in order to prevent them from interfering in the mapping operation. Try out the MAP mechanism to have a look at any of the pre programmed solutions. After loading the file, open the scroller which is placed to the right of the Block button. Select any of the pre programmed solutions to see the solution to pop into the canvas. Note that selecting -------- will bring you back to the initial arrangement of the clusters. When a solution is displayed click the Align button and with the keyboard type MAP into the text field to the right of the label File , then click the canvas. You will now find the mapped solution below the canvas as seen layer by layer from top to bottom of the octaeder.
As you can save and freely open the program code of the puzzle files, you can add your own solutions to the hard wired code if you have a basic knowledge of Java Script. Open the html file which you have locally stored on your computer using a simple text editor and search for function parseSolution() and introduce your own case (case "S1_": ). Then introduce the same name in thre html part under the option values, according to this example: <select id="Lock_Number" size="1" value="-1"> <option value="S1_">18_for_7</option>. When you have a new solution then click the Erase, Store, and Text buttons in this sequence and copy the complete text from [[ to ]] . Then copy this text string in the parseSolution() into the selectable variable var value = ' '; between the two single quotes.
function
parseSolution()
var Solution = Lock_Number.value;
switch ( Solution ) {
case "MySolution":
var value = ' '; < paste
in text here
break;
....
In order to build up a solution you have to be very careful to always place all of the individual balls of all of the clusters on valid crystal latice points of the cubic densest ball packing. Play around with the simple examples listed under the poly ball tetrahedrons to learn to know all of the clusters and to develop your own technique to proceed to solve the puzzles. I always use existing cluster as a template for the positioning, such as the linear tetramer, which can be used as a ruler. When starting to build up a octaeder puzzle I start to build up from the bottom vertex, which lies in the negative range of z-values. In order to be able to place the a cluster on the correct negative level, for instance I use cluster 7 pointing form 000 to 00-3 using Z and Y rotation of the cluster followed by pressing Align. To shift a cluster onto the correct negative level I then translate the first ball of the cluster into the neighborhood of cluster 7 and then click the X>Z button to translate the cluster down to negative z-values. In order to fully overlap the two balls of interest I translate the cluster of interest after clicking the Z>X button again. As the layers in the plane of the monitor are orthogonal, I often use one of the cubic flat pieces such as number 14 or 15, in order to arrange the pieces. Always insure that all of the added clusters are in their correct position by clicking Align. Once the octaeder takes shape you will land up with a sufficient number of reference balls to align clusters in their correct positions. Note that one single ball on one of the outer surfaces of the octaeder is sufficient to place a correctly turned cluster inside the octaeder. This permits to correct mistakes discovered upon the final mapping of a finished solution: Pull out the cluster suspected to be badly placed, correct out its rotations in space and re-place the cluster back into the assembly.
As an instructive exercise to train your insight into the mechanism of the placement of a cluster in the cubic densest ball packing of the octaeder, solve the following problem: Show that the cluster 12 must be turned by 35.26 degrees around the X-axis in order to be placed in the plane which is parallel to the top - front triangular surface of the octaeder. This Xrot rotation follows the placement of the cluster in a delta-X,Y,Z = 0,0,1 alignment of its first two balls ( by rotation of 45 degrees around the Z-axis, and by 315 degrees around the Y-axis). In order to find the solution, you will need to construct the plane of the X-rotation and quantify the rotation angle by discovering a right angled triangle with the known side length of S x 1/2 x √3 and S x 1/ √2, resulting in a cosine ratio of 0.577350 (sine of 0.81655). This according the above table, explains the X-axis rotation angle of 35.26 = 90 - 54.735610 degrees.
For practicing to solve these puzzles, I highly recommend you to select a solution in the scroller, print out the mapping (push the Align button and then type MAP into the File - text field and then move the click the canvas). Then scroll in ---- or refresh the browser and now start to rebuild the solution by using the printed out MAP of the solution. This helps you get acquainted with all of the clusters. You will for instance also notice that once a cluster is correctly positioned by the light green and the blue green ball it can now be placed in the lattice by a mere rotation around Xrot axis without affecting Zrot and Yrot, for instance by using the the X-slider in rotation mode. The same holds also for Z- rotations, allowing the cluster to be spun around Z without effecting the Y- or X- rotations. Careful with Y- rotations, as you can easily get into non valid delta X-, Y- , Z- coordinate increments, leading to a reset of the cluster rotations Xrot, Yrot, Zrot to 0,0,0 degrees.
Puzzles as defined in the PUBLICATION Crystallographic definitions for cube assemblies and ball-pyramid assemblies from poly-cubes and poly-balls, respectively |
|||
|
POLYCUBE CUBES |
POLYBALL TETRAHEDRON |
POLYBALL CUBES |
POLYBALL OCTAEDERS |
|
2x2x2Cube 3x3x3Cube 3x3x3Soma 4x4x4Cube 5x5x5Cube 6x6x6Cube |
3x3x3Ball 4x4x4Ball 4x4x4cBall PBT_4to7 5x5x5Ball 6x6x6Ball 7x7x7Ball 8x8x8Ball |
WEBGL_PBC_2x2x2 WEBGL_PBC_2x2x2a WEBGL_PBC_2x2x2b WEBGL_PBC_3x3x3 WEBGL_PBC_4x4x4 WEBGL_PBC_5x5x5 WEBGL_PBC_6x6x6 |
WEBGL_PBO_2x2x2 WEBGL_PBO_3x3x3 WEBGL_PBO_4x4x4 WEBGL_PBO_4x4x4_6x4R WEBGL_PBO_4x4x4_1to4Fs WEBGL_PBO_4x4x4_4x4T-4x4R WEBGL_PBO_5x5x5 |
 |
 |
|
|
 |
 |
|
|
 |
 |
|
|
 |
 |
|
|
 |
 |
|
|
 |
 |
|
|
HELP and REFERENCES
In all of the Puzzles you will a help text upon clicking the button HELP and the specific Helps for the Polycube and Polyball have been included below including the corresponding definitions of the clusters. Short instructions on how to use the graphical user interface is given here although most of the functionality can easily be grasped by playing around with the user interface. It is best to open the 2x2x2Cube in order to get acquainted with the graphical user interface. Below the canvas one will find a number of buttons and sliders to allow the 3D manipulation of the poly cube clusters. In the upper part of the canvas the most important buttons and sliders have been reproduced for allowing to build up the puzzles in VR (Virtual Reality) mode using goggles and a mouse connected to the mobile phone using an on-the-go USP plug. The first and most important button on the top left side indicates Rot / TRS and permits to switch the movement mode from Transfer to Rotate mode. In the transfer mode the canvas background is black and in the rotate mode it is blue.
Mouse controlled transfer or rotation movements are activated upon clicking as chosen cluster. Upon a second click of the mouse the motion control by the mouse is terminated but the cluster remains activated as indicated by the red status line on the button of the canvas. It indicates Translate active cluster n, or Rotate active cluster n, respectively, with n indicating the chosen cluster number and name. The three sliders labeled X, Y and Z are active in this state for the active cluster. A cluster remains active until the canvas background or another cluster is clicked. Please note that different browsers can have a slightly different behaviour to events (see belows comments on entering orthogonal coordinates or rotation angles into the text field) .
A major problem of playing 3D puzzles on computers stem from the fact that computer monitors are two dimensional only. One of the dimensions is thus in principal always hidden and it is important to be able to freely turn around the view on the Puzzle while building up the solution. This is achieved by the View buttons +90 +45 Tilt -45 -90 , which allow to turn the world by plus or minus 90 or 45 degrees. The Tilt button toggles between 45 degree views from above, from below, or from front. The tilted view is reset to front view upon changing the angle of the view. Constantly switching back and forth the viewing angle is important while building up the puzzle in order to observe the spatial position of a cluster to be placed on the to be completed poly cube.
The Align button is an essential help in order to precisely position a cluster on the growing poly cube. Another very important 2 states toggle button X->Z, respectively Z->X, permits to interchange the horizontal mouse movement between X and Z control. Please note that the the X and Z axis are coupled in the 45, 135, 225 and 315 degree diagonal world view positions. This means that a horizontal mouse movement impacts both the X and Z position at the same time.
The Lock and Block buttons, plus the number scroll field, allows to lock selected clusters in a chosen block from 1 to 5, where 1 is reserved for the final solution. The locking status is indicated on the red status line on the canvas. Locking selected clusters in blocks allows to transfer them as an assembly upon clicking the button Block. Typing LOCK into the File text field discussed below allows to lock all clusters (the finished assembly) to block 1. Typing UNLOCK allows to unlock all clusters again.
The last two rows of controls permit to store intermediate solutions, which is essential when trying to solve one of the challenging puzzles 5x5x5Cube or 6x6x6Cube. Two storage methods are implemented; the rather volatile local storage mechanism in the browser itself and a more complicate storage of the JASON information into a text file.. Please test it with your browser on the 2x2x2 cube as the session storage method does not work with all browsers. Store, Load and Erase are present for this local session storage and concern this storage and not the cluster assembly shown on the canvas. The File text field permits to give a name to the local stored game. Typing SOLUTION into the text field or scrolling in one of the stored solutions in the scroller, brings forth the solution of each poly cube or poly ball puzzle.
Clicking the Store and then the Text button permits to display a JASON (Java Script Object Notation) version of your progressing solution of the puzzle. Copy this text from the starting edged double bracket to the ending edged double bracket ( from [[ to ]] ) with Ctrl C and paste it into MS-Notepad or similar pure text editor with Ctrl V. Save this your computer as a text file (ie 2x2x2cube.txt). You can then recover your saved puzzle at any time by clicking the Browse... button and selecting your file in your file system. This second non volatile storage method is more complicated as Java Script does not allow us to directly save content to the file system for security reasons. This more elaborate storage method must be used with Microsoft Internet Explorer when running programming pages which are stored on the local file system of the client except when on the web server Inetpup/wwwroot.
Typing VR into the TEXT FIELD which follows the header File allows to switch over to Virtual Reality view for phones in goggles. Store your progress state before switching to VR, to be able to load your game status in VR. Also type VR to switch back to mono view.
For educational purposes all code has been included into each time a single html page. No file includes or APIs have been used. Rather standard Java Script has been used in combination with the 2015 introduced WEBGL version of Open Graphic Language (OpenGL). The puzzles run therefore only on recent browsers. I have tested the code on Mozzila Firefox, Chrome, normal and Development versions, on Opera and on MS Explorer and Microsoft Edge.
The following books have been used to develop the code:
E. Angel and D. Shreiner, Interactive Computer Graphics, Pearson, 7th Ed. 2015, ISBN 10: 978-1-292-01934-5.
D. Cantor and B. Jones, WEBGL Beginners Guide, 2012, PACKT, ISBN 978-1-84969-172-7.
K. Matsuda and R. Lea, WebGL Programming Guide, 2015, Adison-Wesley, ISBN 978-0-321-90292-4
Help Polycubes
2x2x2Cube
3x3x3Cube
3x3x3Soma
4x4x4Cube
5x5x5Cube
6x6x6Cube HELP
Help Poly Balls
3x3x3Ball
4x4x4Ball
4x4x4PBT_4to7
5x5x5Ball
6x6x6Ball
7x7x7Ball
8x8x8Ball
HELP
Goal of the puzzle is to build up the
NxNxN poly cubes with N = 2, 3, 4, 5, or 6 depending on which puzzle
selected. The front, bottom edge is always aligned with the X-achsis
with the bottom surface lying on the X-Y plane (the surface of the
computer screen). The cube grows thus layer by layer in direction of the
Z-achsis, thus in direction of the viewer. As the not yet rotated
clusters are alligned by definition along the X-achsis it is logical
that the Z- and Y-achsis rotations define the orthogonal orientation of
each cluster in the cubic crystal structure. It is therefore necesssary
to first orient a cluster correctly in the Z - Y rotation direction and
finaly turn around the X-achsis to position the 3rd and fourth cubes for
non-linear polycube clusters. As an aid to translate the first cube of
an activated (colored) cluster precisely to a desired orthogonal
position, the file-name text field can be used to ENTER an orthogonal
coordinate such as 1,1,2 standing for X = 1, Y = 1, Z = 2. See below under
Orthogonal coordinates input.
Note: so called gimbal locks are
encountered when alligning two rotation achsis x or y or z = + or - 90
degrees, leading to identical or opposed rotations when moving the mouse
in vertical and horizontal direction. A simple work around consists of
reversing the responsible rotations and inverting their order, and/or
activating the x>z - z>x button. Gimbal locks have here been
reduced to a minimum by rotating first around the Z-achsis, followed by Y
rotation and at last about the X-achsis in all rendering operations.
This, as the first and second cube of each cluster lie on the X-achsis
by definition.
Moving Clusters
Translate < - > Rotate
Mouse
controlled transfer or rotation movements are activated upon clicking
as chosen cluster. Upon a second click of the mouse the motion control
by the mouse is terminated but the cluster remains activated as
indicated by the red status line on the button of the canvas. It
indicates Translate active cluster n, or Rotate active cluster n,
respectively, with n indicating the chosen cluster number and name. The
three sliders labeled X, Y and Z are active in this state for the active
cluster. A cluster remains active until the canvas background or
another cluster is clicked.
View
buttons +90 +45 Tilt -45 -90 allow to turn the world by plus or minus 90 or 45 degrees.
Tilt
button
toggles between 45 degree views from above, from below, or from front.
The tilted view is reset to front view upon changing the angle of the
view. Constantly switching back and forth the viewing angle is important
while building up the puzzle in order to observe the spatial position
of a cluster to be placed on the to be completed poly cube.
Align
button is an essential help in order to precisely position a cluster
in the growing poly cube.
X->Z and Z->X
is another very important toggle 2 states button X->Z
and Z->X, respectively, which permits to interchange the horizontal
mouse movement between X and Z control. Please note that the the X and Y
-achsis are coupled in the 45, 135, 225 and 315 degree diagonal view
positions. This means that a horizontal mouse movement impacts both the X
and Z position at the same time.
Lock and Block
buttons, plus
the number scroll field, allows to lock selected clusters in a chosen
block from 1 to 5, where 1 is reserved for the final solution. The
locking status is indicated on the red status line on the canvas.
Locking selected clusters in blocks allows to transfer them as an
assembly upon clicking the button Block. Typing LOCK into the File text
field discussed below allows to lock all clusters (the finished
assembly) to block 1. Typing UNLOCK allows to unlock all clusters again.
Store solutions
The
last two rows of controls permit to store intermediate solutions, which
is essential when trying to solve one of the most challenging puzzles
the 5x5x5Cube, or also the 6x6x6Cube. Two storage methods are
implemented; the rather volatile local storage mechanism in the browser
itself. Please test it with your browser on the 2x2x2 cube as does not
work with all browsers. Store, Load and Erase are present for this local
storage and concern this storage and not the cluster assembly shown on
the canvas. The File text field permits to give a name to the local
stored game. Typing SOLUTION into the text field brings forth the
solution of each cube puzzle.
Load and Text
permit to display a
JASON (Java Script Object Notation) version of your progressing
solution of the puzzle. Copy this text from [[ to ]] with Ctrl C and
paste it into MS-Notepad or similar pure text editor with Ctrl V. Save
this your computer as a text file (ie 2x2x2cube. txt). You can then
recover your saved puzzle at any time by clicking the Browse... button
and selecting your file in your file system. This second non volatile
storage method is more complicated as Java Script does not allow us to
directly save content to the file system for security reasons.
Entry into TEXT FIELD of the following control words - AND THEN CLICK THE CANVAS:
SOLUTION to see the solution
VR
to switch over to Virtual Reality view for phones in goggles.
Store your progress state before switching to VR, to be able to load
your game status in VR
(also VR to switch back to mono view)
PB to switch over to Poly Ball puzzle
(and PC to switch back to Poly Cube puzzle)
LOCK to lock all clusters (the finished assembly) to block 1.
UNLOCK to unlock all clusters again.
PLAN to replace ALIGN to store the present cluster positions for mapping if a non aligned configuration needs to be mapped
MAP to map the present cluster positions - must be preceded by ALIGN
Empty Text Field -- > to erase text below HELP button. Note the input occurs upon a change in the text field.
HELP -- > to show the help text and glossary
Orthogonal
coordinates such as 1,1,2 or 0,0,1 ou 1,0,3 or 0,0,-1 ... -- > to precisely place a
cluster in the poly cube. A) activate the chosen cluster. B) move the
cursor into the file name text field and type the orthogonal coordinate
by a three digit number (the coordinates go from 0 to 9, a leading minus
sign makes all three values go negative), C) click the ALIGN button or hit the ENTER key of your
computer, and then D) move the cursor over the canvas. The rotation
angles in degrees can also be entered after the coordinates such as
0,0,2,180,90,270 for X,Y,Z,Xrot,Yrot,Zrot. If only the angles of a given cluster should be changed
entering ,,,180,90,270 will change Xrot to 180, Yrot to 90 and Zrot to 270
degrees (please note there are no spaces between the leading commas!).
When using the MS internet Explorer only clicking the ALIGN button will do
the job after entering the comma separated values into the text field.
For
educational purposes all code has been included into, each time, a
single html page. No file includes or APIs have been used. Rather
standard Java Script has been used in combination with the 2015
introduced WEBGL version of Open Graphic Language (OpenGL). The puzzles
run therefore only on recent browsers. I have tested the code on
Mozzila Firefox, Chrome, normal and Development versions, on Opera and
on MS Explorer and Microsoft Edge.
The following books have been used to develop the code:
E. Angel and D. Shreiner, Interactive Computer Graphics, Pearson, 7th Ed. 2015, ISBN 10: 978-1-292-01934-5.
D. Cantor and B. Jones, WEBGL Beginners Guide, 2012, PACKT, ISBN 978-1-84969-172-7.
K. Matsuda and R. Lea, WebGL Programming Guide, 2015, Adison-Wesley, ISBN 978-0-321-90292-4
GLOSSARY Cluster_number <-> Cluster_names
1=cluster 2=clustname
1 PC_1F
2 PC_2F
3 PC_3F_180
4 PC_3F_90
5 PC_4F_180_180
6 PC_4F_180_90
7 PC_4F_90_270
8 PC_4F_90_90
9 PC_4F_180y90
10 PC_4T_90y0
11 PC_4R_90_0
12 PC_4R_270_0
13 PC_5F_180_180_180
14 PC_5F_180_180_90
15 PC_5F_180_90_180
16 PC_5F_180_90_270
17 PC_5F_90_180_90
18 PC_5F_90_180_270
19 PC_5F_90_270_90
20 PC_5F_180_90_90
21 PC_5F_180_180y90
22 PC_5F_90y180y270
23 PC_5F_180_90y270
24 PC_5F_90y180y270
25 PC_5T_90_90_0
26 PC_5T_90_0_90 equals:
27 PC_5T_180_90y0
28 PC_5T_180y90_0
29 PC_5T_180y90y0
30 PC_5R_180_90_0
31 PC_5R_180_270_0
32 PC_5R_90_270_0
33 PC_5R_270_90_0
34 PC_5R_90_180y0
35 PC_5R_270_180y0
36 PC_5R_90_270y0
37 PC_5R_270_90y0
38 PC_5R_90_180_0
39 PC_5R_270_180_0
40 PC_5R_90_0_270
41 = 1bis PC_1Fbis
42 = 2bis PC_2Fbis
43 = reserve not used
44 = 13bis PC_5F_180_180_180bis
45 = 25bis PC_5T_90_90_0bis
46 = 26bis PC_5T_90_0_90bis
47 = 27bis PC_5T_180_90y0bis
48 = 28bis PC_5T_180y90_0bis
49 = 29bis PC_5T_180y90y0bis
Goal of the puzzle is to build up the
NxNxN Poly Ball tetraeder with N = 3, 4, 5, 6, 7 or 8 depending on which
puzzle selected. The front, bottom edge is always aligned with the
X-achsis with the bottom surface lying on the X-Y plane (the surface of
the computer screen). The pyramid grows thus layer by layer in
direction of the Z-achsis, thus in direction of the viewer. As the not
yet rotated clusters are alligned by definition along the X-achsis it is
logical that the Z- and Y-achsis rotations define the trigonal
orientation of each cluster in the cubic densest ball packing - crystal
structure. It is therefore necesssary to first orient a cluster
correctly in the Z - Y rotation direction and finaly turn around the
X-achsis to position the 3rd and fourth ball for non-linear ball
clusters. As an aid to translate the first ball of a activated (colored)
cluster precisely to a desired trigonal position, the file-name text
field can be used to ENTER a trigonal coordinate such as 1,1,2 standing
for Xtrig = 1, Ytrig = 1, Ztrig = 2. See below under Trigonal
coordinates input.
Note: so called gimbal locks are encountered
when alligning two rotation achsis x or y or z = + or - 90 degrees,
leading to identical or opposed rotations when moving the mouse in
vertical and horizontal direction. A simple work around consists of
reversing the responsible rotations and inverting their order, and/or
activating the x>z - z>x button. Gimbal locks have here been
reduced to a minimum by rotating first around the Z-achsis, followed by Y
rotation and at last about the X-achsis in all rendering operations.
This, as the first and second ball of each cluster lie on the X-achsis
by definition.
Moving Clusters
Translate < - > Rotate
Mouse
controlled transfer or rotation movements are activated upon clicking
as chosen cluster. Upon a second click of the mouse the motion control
by the mouse is terminated but the cluster remains activated as
indicated by the green coloring of the selected cluster and the as
indicated by the red status line on the button of the canvas. It
indicates Translate active cluster n, or Rotate active cluster n,
respectively, with n indicating the chosen cluster number and name. The
three sliders labeled X, Y and Z are active in this state for the active
cluster. A cluster remains active until the canvas background or
another cluster is clicked. Please click the canvas before switching
from Rotate to Translate mode.
View
buttons +90 +45 Tilt -45 -90 allow to turn the world by plus or minus 90 or 45 degrees.
Tilt
button
toggles between 45 degree views from above, from below, or from front.
The tilted view is reset to front view upon changing the angle of the
view. Constantly switching back and forth the viewing angle is important
while building up the puzzle in order to observe the spatial position
of a cluster to be placed on the to be completed poly cube.
Align
button next to the Z- slider is an essential help in order to precisely position a cluster on the growing poly cube.
X->Z and Z->X
Below
the Y-Slider is another very important toggle 2 states button X->Z
and Z->X, respectively, which permits to interchange the horizontal
mouse movement between X and Z control. Please note that the the X and Y
-achsis are coupled in the 45, 135, 225 and 315 degree diagonal view
positions. This means that a horizontal mouse movement impacts both the X
and Z position at the same time.
Lock and Block
buttons, plus
the number scroll field, allows to lock selected clusters in a chosen
block from 1 to 5, where 1 is reserved for the final solution. The
locking status is indicated on the red status line on the canvas.
Locking selected clusters in blocks allows to transfer them as an
assembly upon clicking the button Block. Typing LOCK into the File text
field discussed below allows to lock all clusters (the finished
assembly) to block 1. Typing UNLOCK allows to unlock all clusters again.
Store solutions
The
last two rows of controls permit to store intermediate solutions, which
is essential when trying to solve the large puzzles such as PB_5x5x5-
to PB_8x8x8- Pyramides. Two storage methods are implemented; the rather
volatile local storage mechanism in the browser itself. Please test it
with your browser on the PB_3x3x3 - Pyramid, as this method does not
work with all browsers. Store, Load and Erase are present for this local
storage and concern this storage and not the cluster assembly shown on
the canvas. The File text field permits to give a name to the local
stored game. Typing SOLUTION into the text field brings forth the
solution of each cube puzzle. See the comment below under SOLUTION, for
the case that several solutions are stored for the puzzle
Load and Text
permit
to display a JASON (Java Script Object Notation) version of your
progressing solution of the puzzle. Copy this text from [[ to ]] with
Ctrl C and paste it into MS-Notepad or similar pure text editor with
Ctrl V. Save this your computer as a text file (ie PB_3x3x3.txt). You
can then recover your saved puzzle at any time by clicking the Browse...
button and selecting your file in your file system. This second non
volatile storage method is more complicated as Java Script does not
allow us to directly save content to the file system for security
reasons.
Entry into TEXT FIELD of the following control words - AND THEN CLICK THE CANVAS:
SOLUTION
to see the solution. Click on the Block Scroller to see if several
solutions have been stored. S stands for the regular solution, S60cw
and S60ccw stand for the same solution turned by 60 degrees clock wise
and counter clock wise, respectively. R, L and F indicate the same
solution upon flipping the tetrahedron to the right, left, or front,
respectively. Selecting any solution in the scroller, different from the
block numbers 1 to 5, will display the chosen solution.
VR
to switch over to Virtual Reality view for phones in goggles.
Store your progress state before switching to VR, to be able to load
your game status in VR
(also VR to switch back to mono view).
LOCK to lock all clusters (the finished assembly) to block 1.
UNLOCK to unlock all clusters again.
PLAN to replace ALIGN to store the present cluster positions for mapping if a non aligned configuration needs to be mapped
MAP to map the present cluster positions - must be preceded by ALIGN
Empty Text Field -- > to erase text below HELP button. Note the input occurs upon a change in the text field.
HELP -- > to show the help text and glossary
Trigonal coordinates such as 1,1,2 or 0,0,1 or 1,0,3 ... -- > to precisely
place a cluster in the poly cube. A) activate the chosen cluster. B) move
the cursor into the file name text field and type the orthogonal coordinate
by a three digit number (the coordinates go from 0 to 9, a leading minus
sign makes all three values go negative), C) click the ALIGN button or hit
the ENTER key of your computer, and then D) move the cursor over the canvas.
The rotation angles in degrees can also be entered after the coordinates
such as 0,0,2,180,90,270 for Xtrig,Ytrig,Ztrig,Xrot,Yrot,Zrot. If only the angles of a given cluster should be
changed entering ,,,180,90,270 will change Xrot to 180, Yrot to 90 and Zrot
to 270 degrees (please note there are no spaces between the leading
commas!). When using the MS internet Explorer only clicking the ALIGN button
will do the job after entering the comma separated values into the text
field.
For
educational purposes all code has been included into, each time, a
single html page. No file includes or APIs have been used. Rather
standard Java Script has been used in combination with the 2015
introduced WEBGL version of Open Graphic Language (OpenGL). The puzzles
run therefore only on recent browsers. I have tested the code on
Mozzila Firefox, Chrome, normal and Development versions, on Opera and
on MS Explorer and Microsoft Edge.
The following books have been used to develop the code:
E. Angel and D. Shreiner, Interactive Computer Graphics, Pearson, 7th Ed. 2015, ISBN 10: 978-1-292-01934-5.
D. Cantor and B. Jones, WEBGL Beginners Guide, 2012, PACKT, ISBN 978-1-84969-172-7.
K. Matsuda and R. Lea, WebGL Programming Guide, 2015, Adison-Wesley, ISBN 978-0-321-90292-4
GLOSSARY Cluster_number <-> Cluster_names
1=cluster 2=clustname
1 PB_1F
2 PB_2F
3 PB_3F_180
4 PB_3F_60
5 PB_3F_120
6 PB_3F_90
7 PB_4F_180_180
8 PB_4F_180_60
9 PB_4F_180_120
10 PB_4F_180_90
11 PB_4F_120_120
12 PB_4F_60y120
13 PB_4F_120_240
14 PB_4F_90_90
15 PB_4F_90_270
16 PB_4F_120y240
17 PB_4F_90y180
18 PB_4T_60y60
19 PB_4T_60y120
20 PB_4T_60_90
21 PB_4T_90y120
22 PB_4R_120_120
23 PB_4R_240_240
24 PB_4R_120_240
25 PB_4R_240_120
26 PB_4R_90_120
27 PB_4R_270_240
28 PB_4R_90_240
29 PB_4R_270_120
30 PB_4R_60y90
31 PB_4R_300y270
32 PB_1Fa
33 PB_4T_60_60a
34 PB_4F_180_60b
35 PB_4F_180_60c
36 PB_4F_180_60c
37 PB_4F_180_60d